
Beginner Electronics Projects with Circuits: Easy & Fun DIY Ideas
Category: Digital Electronics
Kickstart Your Electronics Journey with Simple Circuit Projects
Diving into the world of electronics can feel overwhelming if you're just starting out, but engaging with beginner electronics projects that come with clear circuit diagrams offers the perfect way to learn and experiment. Whether you’re a hobbyist eager to build digital and analog circuits or someone fascinated by radio technology, this guide is tailored for you. We've curated practical projects that use common components, enabling you to develop foundational skills without needing advanced expertise or complicated setups.
You likely found this post while looking for straightforward, hands-on projects that provide detailed tutorials, not just vague instructions that leave you guessing. Unlike other resources that either overwhelm beginners with complexity or provide only theoretical knowledge, here you'll find step-by-step guidance that demystifies circuit building, helping you move from concept to working prototype quickly and confidently.
By following these projects, you’ll enhance your understanding of key concepts in electronics, sharpen your soldering and wiring skills, and enjoy the satisfaction of seeing your circuits come alive. This post also touches on essential components, troubleshooting tips, and ways to expand your projects as you grow. Read on to unlock practical electronics knowledge that’s fun, manageable, and rewarding.
- Kickstart Your Electronics Journey with Simple Circuit Projects
- Understanding Basic Electronics Components: Resistors, Capacitors, LEDs, Transistors, and More
- Getting Started with Essential Tools
- Simple LED Circuit Projects: Classic Beginner Builds with Step-by-Step Guides
- Building Basic Analog Circuits: Introduction to Amplifiers, Voltage Regulators, and Oscillators
- Digital Electronics Basics: Logic Gates, Flip-Flops, and Simple Combinational Circuits
- Introduction to Microcontroller Projects for Beginners: Using Arduino and Beyond
- Exploring Radio Technology Projects: Build Basic AM/FM Radio Receivers and Learn the Fundamentals of Radio Communication Circuits
- Troubleshooting and Testing Techniques: Common Mistakes, Diagnosing Circuit Problems, and Tips for Flawless Projects
Understanding Basic Electronics Components: Resistors, Capacitors, LEDs, Transistors, and More
To confidently build and troubleshoot your electronic projects, it’s essential to familiarize yourself with the basic electronic components that form the building blocks of any circuit. Each component serves a unique function, and knowing how to identify them — both physically and in circuit diagrams — will elevate your hands-on skills and deepen your grasp of electronics fundamentals.
Key Components and Their Functions
-
Resistors
Resistors limit electrical current flow and divide voltages within a circuit. They come in various resistance values, usually indicated by a color-coded band system. Recognizing resistors and understanding their role is crucial for controlling how much current passes through different parts of your project. -
Capacitors
Capacitors store and release electrical energy, filtering signals and stabilizing voltages. They vary by type (ceramic, electrolytic, tantalum) and capacitance values, often printed directly on their bodies. Learning to read these values helps you choose the right capacitor for timing, smoothing, or coupling applications. -
Light Emitting Diodes (LEDs)
LEDs emit light when current passes through them in the correct direction, making them perfect status indicators or simple display elements in your circuits. Identifying the LED’s anode and cathode — usually by lead length or a flat edge on the casing — is essential for proper installation. -
Transistors
Acting as switches or amplifiers, transistors control large currents with smaller signals. The most common types, NPN and PNP bipolar junction transistors (BJTs), have three pins: collector, base, and emitter. Understanding transistor pinouts and operation is foundational for creating more complex analog and digital circuits. -
Other Common Components
- Diodes: Allow current to flow in one direction only, protecting circuits from reverse voltage.
- Inductors: Store energy in a magnetic field, often used in filters or oscillators.
- Switches and Buttons: Provide user control by opening or closing circuits.
How to Identify Components Quickly
- Physical appearance: Components have distinct shapes and markings — for example, a resistor’s color bands or an LED’s dome shape and flat edge.
- Datasheets: Manufacturer datasheets explain exact specifications and pin configurations.
- Multimeter testing: Using a multimeter to measure resistance, capacitance, or diode direction can confirm a component’s type and health.
Mastering these components’ functions and identifications not only empowers you to confidently assemble circuits but also to innovate, modify, and troubleshoot like a pro in your electronics journey.
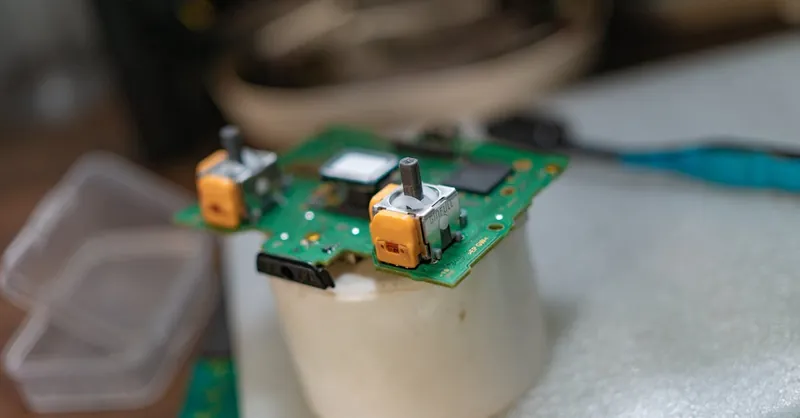
Image courtesy of FOX ^.ᆽ.^= ∫
Getting Started with Essential Tools
Before diving into building your first circuits, it's important to equip yourself with the essential electronics tools that make project assembly, measurement, and troubleshooting straightforward, efficient, and enjoyable. Having the right tools not only enhances your learning experience but also boosts confidence as a beginner in digital and analog electronics.
Must-Have Tools for Every Beginner
-
Soldering Iron
A quality soldering iron is indispensable for creating permanent connections on printed circuit boards (PCBs) and prototyping components neatly. For beginners, a soldering iron with adjustable temperature control helps prevent damage to sensitive components, and a fine tip improves precision on small circuit pads. Always use lead-free solder and follow safety precautions. -
Multimeter
The multimeter is the all-in-one diagnostic tool every electronics hobbyist needs. It measures voltage, current, resistance, and continuity—allowing you to verify component values, test circuits, and quickly troubleshoot faults. Start with a user-friendly digital multimeter (DMM) featuring clear displays and auto-ranging for ease of use. -
Breadboard
Breadboards are essential for prototyping circuits without soldering. They let you insert and rearrange components freely, enabling experimentation and modifications without permanent assembly. Familiarizing yourself with breadboard layouts and jumper wires will make circuit building faster and more intuitive. -
Wire Strippers and Cutters
Cleanly stripped wires ensure reliable electrical connections. Use dedicated wire strippers matched to your wire gauge to avoid damaging the conductor. Wire cutters are handy for trimming leads and wires to size, keeping your workspace neat and connections secure. -
Additional Handy Tools
- Tweezers: For positioning tiny components.
- Helping Hands or PCB Holders: To keep your project steady while soldering or assembling.
- Desoldering Pump or Wick: Useful to correct soldering mistakes by removing excess solder.
- Magnifying Glass or Headset: Helps inspect small joints and components closely.
Investing time in understanding and selecting these fundamental tools will set a solid foundation for your electronics journey. Well-equipped and properly used tools empower you to build circuits confidently, make precise measurements, and troubleshoot effectively—critical skills that will unlock the fun and creativity of both digital and analog electronics projects.
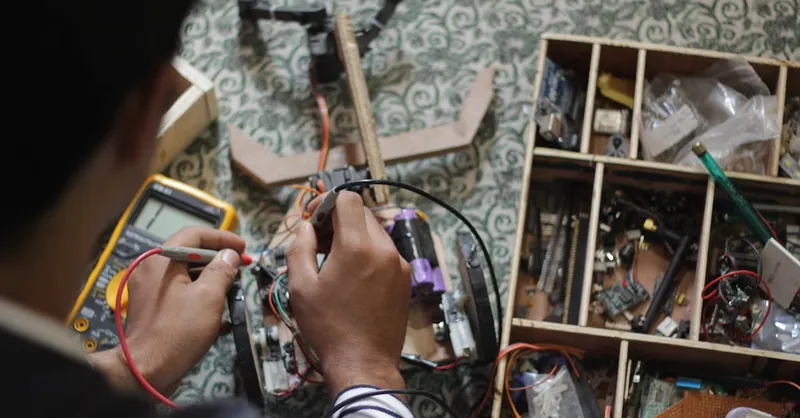
Image courtesy of FURQAN KHURSHID
Simple LED Circuit Projects: Classic Beginner Builds with Step-by-Step Guides
One of the most rewarding ways to build confidence as a beginner in electronics is by working on simple LED circuit projects. LEDs (Light Emitting Diodes) are among the easiest components to use and instantly show your circuit’s activity through light—making them perfect for hands-on learning. Starting with basic LED blinkers, dimmers, and multi-LED flashing patterns, these projects introduce core electronic concepts like current limiting, timing, and transistor switching in an approachable way.
Build a Basic LED Blinker Circuit
The classic LED blinker project is an excellent first step to understand how electronic components interact. Usually implemented with a 555 timer IC or a simple transistor oscillator, this circuit turns an LED on and off at regular intervals, demonstrating how changing circuit parameters affects timing.
Key learning points:
- Using a resistor to limit current to the LED and protect it from damage
- Understanding pulse generation and frequency control via resistors and capacitors
- Introducing the 555 timer IC, a versatile chip useful in timing and oscillation circuits
Create an LED Dimmer Using a Potentiometer
Going beyond simple on/off control, an LED dimmer circuit teaches beginners about analog control and brightness modulation. By incorporating a variable resistor (potentiometer), you adjust the voltage or current flowing through the LED, visibly varying its brightness.
Essential takeaways:
- Practicing smooth control of LED brightness via resistance adjustment
- Gaining familiarity with potentiometers as input devices in circuits
- Exploring the relationship between current, voltage, and light output in LEDs
Design Multi-LED Flashing Patterns for Visual Effects
Once comfortable with single LED circuits, challenge yourself with multi-LED flashing patterns that use simple logic or transistor switching to create eye-catching sequences. This introduces fundamental concepts in digital electronics such as logic gates, pulse timing, and the use of multiple control elements in a circuit.
What you’ll learn:
- Wiring and controlling multiple LEDs in series and parallel arrangements
- Using transistors or ICs to switch LEDs on and off in patterns
- Implementing basic pulse and delay circuits to create dynamic visual effects
These step-by-step LED circuit tutorials make excellent foundational projects for budding hobbyists. They combine theory with practical assembly, promoting hands-on understanding of how current flows, how timing components interact, and how you can control electronic devices effectively. By mastering these classic LED circuits, you’ll build essential skills and confidence to tackle more complex analog, digital, and radio electronics projects.
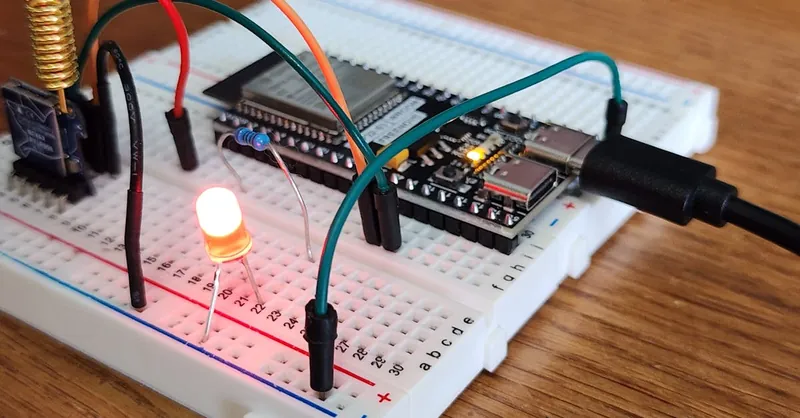
Image courtesy of Bmonster Lab
Building Basic Analog Circuits: Introduction to Amplifiers, Voltage Regulators, and Oscillators
Diving deeper into analog electronics, building foundational circuits like amplifiers, voltage regulators, and oscillators allows beginners to explore essential concepts that power countless devices. These classic analog circuits provide a hands-on way to understand signal control, power stability, and waveform generation using straightforward components and easy-to-follow schematics.
Understanding Analog Amplifiers
An amplifier boosts weak electrical signals to levels suitable for driving speakers, sensors, or other components. Starting with simple transistor-based amplifiers helps you learn how a small input current at the transistor’s base controls a larger current flow through the collector and emitter. Key concepts include:
- Gain: How much the amplifier increases signal strength
- Biasing: Setting the correct operating point for linear amplification
- Distortion and feedback: Effects influencing sound or signal quality
Simple amplifier circuits often use NPN transistors or operational amplifiers (op-amps), making them excellent projects to refine your understanding of transistor operation and analog signal processing.
Voltage Regulators for Stable Power Supply
Voltage regulators are critical for maintaining a constant output voltage regardless of variations in input voltage or load conditions—ensuring your circuits work reliably. Learning to build basic regulators using components like the 7805 voltage regulator IC or Zener diodes teaches you how to protect sensitive electronics from voltage fluctuations.
Important points include:
- Understanding fixed vs. adjustable voltage regulators
- Implementing filtering capacitors to smooth output voltage
- Ensuring proper heat dissipation and component ratings
Mastering basic voltage regulators will give you confidence in powering analog and digital circuits safely, a skill crucial for every electronics hobbyist.
Oscillators: Creating Continuous Waveforms
Oscillators generate repetitive waveforms such as sine, square, or triangle waves, which are foundational in radios, clocks, and signal generators. Building beginner-friendly oscillator circuits, like the astable multivibrator using transistors or the 555 timer in astable mode, introduces you to:
- Frequency control through resistors and capacitors
- The role of feedback in sustaining oscillations
- Practical applications like LED flashers, tone generators, and pulse width modulators
These facile oscillator projects help you grasp how electronic components create timed signals and pulses, a key stepping stone in both analog and radio frequency (RF) electronics.
By incorporating these basic analog circuits into your learning path, you gain practical insight into how everyday electronic devices manage signals and power. Exploring amplifiers, regulators, and oscillators solidifies your understanding of component interaction and circuit behavior, paving the way for more advanced analog and mixed-signal electronics adventures.

Image courtesy of Egor Komarov
Digital Electronics Basics: Logic Gates, Flip-Flops, and Simple Combinational Circuits
Understanding digital electronics fundamentals unlocks the power behind virtually all modern electronic devices, from computers and smartphones to home appliances and automotive systems. At its core, digital electronics relies on discrete signals—typically represented as binary 0s and 1s—that are manipulated through logic gates, flip-flops, and combinational circuits. These elements form the building blocks of complex circuits enabling computation, memory storage, and decision-making processes.
Exploring Logic Gates: The Foundation of Digital Circuits
Logic gates perform basic boolean operations on one or more binary inputs to produce a single output. Mastering these gates is essential for beginners working on digital circuits and microcontroller projects. The primary logic gates include:
- AND gate: Outputs HIGH only if all inputs are HIGH.
- OR gate: Outputs HIGH if any input is HIGH.
- NOT gate (Inverter): Outputs the logical opposite of the input.
- NAND gate: Outputs LOW only if all inputs are HIGH (inverse of AND).
- NOR gate: Outputs HIGH only if all inputs are LOW (inverse of OR).
- XOR gate: Outputs HIGH if an odd number of inputs are HIGH (exclusive OR).
- XNOR gate: Outputs HIGH if an even number of inputs are HIGH (exclusive NOR).
These gates can be combined to implement complex logical expressions and control signals effectively. Beginners often start by building truth tables, wiring simple gate circuits on breadboards, and simulating them with software to see real-time digital logic operations.
Flip-Flops: The Basics of Binary Storage and Memory
Flip-flops are fundamental digital memory circuits that store a single bit of data, controlling binary state changes in sequential logic. They enable devices to remember previous input states, essential for counters, registers, and timing circuits. The most common types include:
- SR (Set-Reset) Flip-Flop: Basic memory circuit using two NOR or NAND gates.
- D (Data) Flip-Flop: Captures and stores input data on a triggering clock edge.
- JK Flip-Flop: Versatile type supporting toggle operations to implement counters.
- T (Toggle) Flip-Flop: Changes output state on each clock pulse, useful for frequency division.
Studying flip-flops teaches how digital circuits synchronize state transitions, implement binary storage, and form the foundation for digital timing and control systems.
Building Simple Combinational Circuits for Practical Applications
Combinational circuits combine multiple logic gates to perform tasks such as addition, subtraction, multiplexing, and decoding without involving memory elements. Beginners can experiment with:
- Adders: Circuits like half-adders and full-adders that add binary numbers.
- Multiplexers (MUX): Select one input from several inputs based on control signals.
- Decoders/Demultiplexers: Translate binary inputs into a single active output line.
- Comparators: Compare binary values and output relational signals (equal, greater than).
These projects provide hands-on experience with designing useful digital functions and understanding how complex tasks are decomposed into simple binary logic operations.
Mastering these digital electronics basics equips you with the skills to design, analyze, and troubleshoot circuits that form the brains of modern technology. Whether you're creating simple LED patterns or programming microcontrollers, a solid grasp of logic gates, flip-flops, and combinational circuits is indispensable for your hobbyist projects and professional growth in electronics.

Image courtesy of Pachon in Motion
Introduction to Microcontroller Projects for Beginners: Using Arduino and Beyond
Microcontrollers are the heart of modern interactive electronics projects, enabling you to combine digital logic, sensors, and actuators into programmable systems with endless possibilities. For beginners, the Arduino platform stands out as one of the most accessible and versatile microcontrollers, offering an intuitive programming environment and ample community resources. By integrating Arduino or similar microcontrollers into your projects, you can create interactive circuits that respond to inputs, control outputs, and communicate with other devices, moving far beyond static analog or digital circuits.
Why Start with Arduino and Microcontrollers?
- User-Friendly Programming: Arduino's simplified C/C++ language and vast set of libraries let beginners write, upload, and test code quickly, accelerating the learning curve for embedded development.
- Rich Hardware Ecosystem: Compatible with numerous sensors, displays, motors, and wireless modules, Arduino boards enable practical experiments ranging from basic LED blinking to advanced robotics and IoT projects.
- Hands-On Learning: Microcontroller projects reinforce electronics concepts such as GPIO pin control, PWM, ADC/DAC, serial communication, and interrupts, weaving together theory and real-world applications.
Practical Example: Blinking an LED with Arduino
A foundational microcontroller project involves programming an LED to blink on and off at specific intervals. This simple task teaches how to use digital output pins, introduce timing delays, and write basic control structures in code. Expanding on this, you can experiment with adjusting blink rates, adding multiple LEDs, or reading button inputs to control the behavior interactively.
Expanding to Sensor-Based Projects
Once comfortable with basic microcontroller control, you can incorporate sensors like temperature probes, light sensors, or motion detectors to create responsive projects such as automated lighting, environmental monitors, or alarm systems. These project ideas combine your knowledge of circuit building with microcontroller programming skills, providing rewarding, practical applications.
Embarking on your microcontroller journey with Arduino or comparable platforms supercharges your electronics projects, transforming simple circuits into dynamic, programmable systems. By starting with beginner-friendly examples and steadily exploring sensor integration and control strategies, you open the door to exciting digital electronics, robotics, and radio technology adventures.
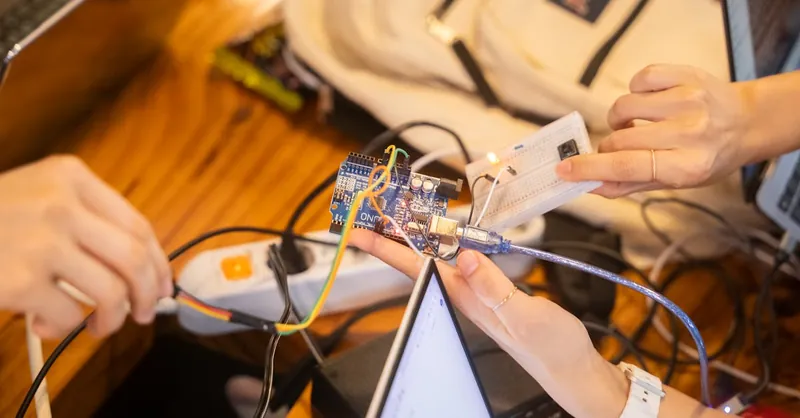
Image courtesy of Youn Seung Jin
Exploring Radio Technology Projects: Build Basic AM/FM Radio Receivers and Learn the Fundamentals of Radio Communication Circuits
Radio technology is a fascinating area of electronics where analog concepts and signal processing come alive to enable wireless communication. For beginners, constructing simple AM and FM radio receivers offers a compelling hands-on introduction to how radio waves are received, decoded, and converted into audio signals. These projects demystify the principles behind radio communication circuits and help you develop skills in tuning, filtering, and signal amplification.
Building Basic AM Radio Receivers
An AM (Amplitude Modulation) radio receiver project typically involves components such as coils (inductors), variable capacitors (for tuning), diodes (for signal detection), and audio amplifiers. This setup teaches you how radio signals oscillate at various frequencies and how to extract the audio content encoded through amplitude variations. Key learning points include:
- Tuning circuits: Using LC (inductor-capacitor) tanks to select specific frequencies from a broad radio spectrum.
- Demodulation: Employing diode detectors to recover audio signals from the modulated carrier wave.
- Audio amplification: Using transistors or op-amps to boost weak detected signals so they can drive headphones or speakers.
Exploring FM Radio Receiver Fundamentals
FM (Frequency Modulation) receivers introduce more complexity but deepen your understanding of frequency-based modulation and demodulation techniques. Essential topics encountered in basic FM circuit projects include:
- Frequency discrimination: Using devices like the Foster–Seeley discriminator or phase-locked loops (PLLs) to interpret frequency changes in FM signals.
- Intermediate frequency (IF) filtering: Applying tuned circuits or ceramic filters to isolate and process the desired signal effectively.
- Signal strength and noise reduction: Techniques to improve audio clarity and reception stability.
Practical Benefits of Radio Circuit Projects
Beyond the satisfaction of hearing your handcrafted radio tune in, these projects help you grasp fundamental electronic and electromagnetic principles such as:
- Resonance and selective frequency filtering using LC circuits.
- Signal rectification and envelope detection with semiconductor diodes.
- Amplifier biasing and gain control for clear audio output.
- Antenna design and impedance matching to maximize signal reception.
Mastering these beginner-friendly radio technology projects not only boosts your electronics troubleshooting and design skills but also opens the gateway to more advanced RF (radio frequency) experiments like transceivers, modulators, and wireless communication systems. Whether you’re passionate about vintage radio restoration or eager to experiment with modern radio circuits, building AM/FM receivers gives you a practical, enriching start into the exciting realm of radio electronics.
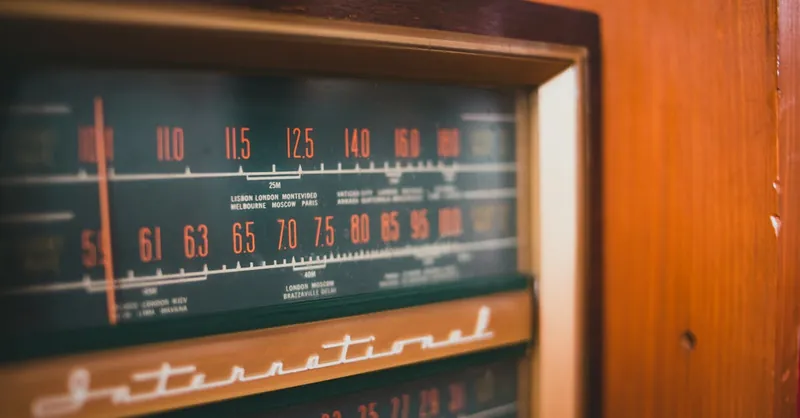
Image courtesy of Erik Mclean
Troubleshooting and Testing Techniques: Common Mistakes, Diagnosing Circuit Problems, and Tips for Flawless Projects
Even the simplest beginner electronics projects can sometimes run into issues, making troubleshooting and testing skills essential for ensuring your circuits work flawlessly. Understanding common mistakes, systematic diagnosis, and effective testing approaches will save you time and frustration, empowering you to become a confident electronics hobbyist.
Common Mistakes Beginners Make
-
Incorrect Component Orientation:
Components like LEDs, diodes, and transistors have polarity; reversing their orientation is a frequent source of circuit failure. Always double-check datasheets and component markings before soldering or plugging in. -
Wrong Connections or Missing Wires:
Misplaced jumper wires or incomplete circuit wiring often cause non-functioning projects. Using a clear schematic and methodically placing wires on a breadboard helps prevent shortcuts or errors. -
Improper Use of Resistors and Power Ratings:
Skipping current-limiting resistors for LEDs or underestimating resistor wattage leads to component damage. Verify resistor values with a multimeter and calculate the expected current beforehand. -
Power Supply Issues:
Supplying incorrect voltage or insufficient current, or forgetting to connect ground references, might cause erratic behavior or prevent the circuit from powering up. -
Cold or Bad Solder Joints:
Dull, cracked, or bridged solder joints can cause intermittent connections or shorts. Good soldering technique and visual inspection under magnification are crucial.
How to Diagnose Circuit Problems Effectively
-
Visual Inspection: Start by carefully examining your circuit for obvious errors—incorrect wiring, bent pins, damaged components, or loose connections.
-
Use a Multimeter: Test voltage levels at key points, measure resistance to confirm component integrity, and check continuity to spot broken traces or connections.
-
Divide and Conquer: Break the circuit into smaller sections and test them individually. For example, verify power supply output first, then test input signals, and finally the output stage.
-
Substitute and Isolate Components: Swap suspected faulty components with known good ones or temporarily bypass parts to narrow down issues.
-
Leverage Oscilloscopes or Logic Analyzers: For more advanced troubleshooting, use oscilloscopes to observe signal waveforms or logic analyzers to decode digital signals, helping identify timing or logic errors.
Tips to Ensure Your Projects Work Flawlessly
-
Plan Before Building: Carefully read circuit schematics, identify every component’s role, and make a clear wiring plan before assembling.
-
Build Incrementally: Assemble and test your circuit in stages, confirming each part works before adding more complexity.
-
Label and Organize Components: Keep components sorted and labeled to avoid confusion and accidental swap of similar parts.
-
Document Your Work: Keep notes of component values, modifications, and measurements; it aids troubleshooting and replicating successful projects.
-
Practice Good Wiring Habits: Use color-coded wires consistently (e.g., red for power, black for ground) and keep wiring neat to reduce mistakes and shorts.
-
Test With a Low Power Setting First: When possible, power up your circuit with current-limited supplies or reduce voltage to avoid damaging components during initial tests.
Mastering these troubleshooting methods and testing techniques will significantly enhance your success rate in electronics projects. By being systematic and patient, you transform challenges into valuable learning opportunities that sharpen your skills in both digital and analog domains, radio technology, and beyond.
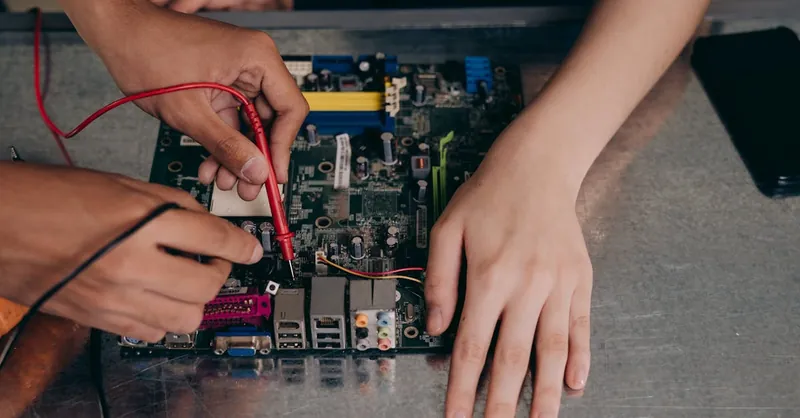
Image courtesy of Mikhail Nilov