
Best Components for Vintage Radio Repair: A Hobbyist’s Guide
Category: Digital Electronics
Unlock the Secrets to Sourcing the Best Components for Vintage Radio Repair
If you’re a dedicated electronics hobbyist or a vintage radio enthusiast, you know that restoring old radios isn’t just about reconnecting wires—it’s about breathing life into a piece of history. Finding the right replacement parts is often the most challenging part of this journey. Whether your radio dates back to the golden age of vacuum tubes or the early transistor era, components that closely match the original specifications are essential for authentic sound, reliability, and preservation of value.
You’ve likely scoured forums, checked out online shops, and maybe even salvaged parts from other units, but the plethora of options and the technical specifics can be overwhelming. Should you replace old paper capacitors with modern film types? What about resistors and tubes—should you go exact or opt for equivalents? And where can you source quality parts that won’t break your budget?
This guide offers a comprehensive, hands-on approach to selecting the best components for vintage radio repair, tailored specifically for hobbyists who want clear tutorials and trustworthy advice. We focus on key components from capacitors and resistors to tubes and coils, their modern substitutes, and how to test and choose them wisely. Dive in and discover practical tips that will empower you to restore your radios with confidence and precision.
- Unlock the Secrets to Sourcing the Best Components for Vintage Radio Repair
- Understanding the Importance of Original Component Specs in Vintage Radio Repair: Why Matching or Equivalent Replacements Matter
- Capacitors: Identifying and Selecting the Best Capacitor Types for Vintage Radios
- Resistors and Their Vintage Equivalents: How to Choose Suitable Replacement Resistors That Preserve Original Circuit Behavior
- Vacuum Tubes and Transistors: Sourcing Authentic Tubes vs. Modern Equivalents and Testing Procedures
- Transformers, Inductors, and Coils: Maintaining Signal Integrity – Best Practices for Repairing or Replacing Magnetic Components
- Dial and Speaker Components: Tips on Refurbishing or Replacing Bulky Mechanical Parts and Vintage Speakers
- Sourcing Components: Reliable Suppliers, Salvage Techniques, and Online Resources for Vintage Radio Parts
- Testing Equipment and Tools: Essential Gear to Verify Components and Ensure Quality Restoration
- Safety and Handling Practices: How to Safely Work with Vintage Electronics and Avoid Damaging Sensitive Parts
- Best Practices for Component Installation and Circuit Testing to Maximize Longevity and Performance
Understanding the Importance of Original Component Specs in Vintage Radio Repair: Why Matching or Equivalent Replacements Matter
When it comes to restoring vintage radios, matching original component specifications is not simply a matter of nostalgia—it’s a critical factor that affects the radio's performance, sound quality, and long-term reliability. Vintage circuits were meticulously designed with specific component values, tolerances, and types in mind; substituting these with incorrect or inferior parts can lead to suboptimal operation, excessive noise, or even damage to the radio’s delicate internals.
For example, capacitors in vintage radios often have precise capacitance and voltage ratings that impact tuning, frequency response, and stability. Replacing an old paper capacitor with a modern film capacitor of similar specs ensures the circuit maintains its original characteristics, such as frequency roll-off and transient response. Similarly, resistors with the correct wattage and tolerance preserve the intended current flow and prevent overheating or signal distortion.
However, sourcing exact original components is often impossible nowadays, so finding equivalent replacements that closely match original specs becomes essential. Key factors to consider when selecting substitutes include:
- Electrical specifications: Capacitance, resistance, voltage rating, and tolerance should closely align with the original values to maintain circuit integrity.
- Physical characteristics: Size and lead spacing matter, especially for tight chassis layouts in vintage radios.
- Temperature stability and dielectric type: Components like capacitors can affect sound quality depending on construction materials. For example, film capacitors usually offer better stability and less microphonic noise than original paper types.
- Replacement tube equivalents: Vacuum tubes must match heater voltage, gain, and pin configuration to function properly without circuit modifications.
By respecting original component specs and choosing wisely between direct replacements and carefully selected modern equivalents, you preserve the radio’s authentic sound and extend its operational life. This approach not only honors the craftsmanship of classic radio designs but also ensures your restoration project stands the test of time.

Image courtesy of Nimit N
Capacitors: Identifying and Selecting the Best Capacitor Types for Vintage Radios
Capacitors play a critical role in vintage radio circuits, influencing everything from signal coupling and filtering to tuning and audio quality. When restoring these radios, understanding the different capacitor types—paper, electrolytic, and modern film capacitors—is vital for both authenticity and performance.
Paper Capacitors: The Classic Choice with Limitations
Original vintage radios frequently used paper and oil capacitors, prized in their era for availability and cost. While these capacitors often have the proper capacitance and voltage ratings, their paper dielectric is prone to degradation, leakage, and increased ESR (Equivalent Series Resistance) over time. This leads to hum, distortion, or even circuit failure. Although replacing with exact original paper capacitors might seem ideal for authenticity, their unreliability typically necessitates using modern alternatives to ensure longevity without sacrificing sound quality.
Electrolytic Capacitors: Polarity and Replacement Considerations
Electrolytic capacitors, primarily used in power supply filtering and decoupling, also age poorly due to electrolyte drying out or leakage. Restorers should note that polarity is crucial; incorrect installation damages components or circuits. Modern electrolytics with enhanced materials and tighter tolerances often outperform original units but may be physically larger, so verify dimensions before purchasing.
Modern Film Capacitors: The Best All-Around Replacement
For signal path and coupling applications, modern film capacitors (polyester, polypropylene, or polystyrene) provide a significant upgrade. These capacitors feature superior temperature stability, low dielectric absorption, low ESR, and minimal microphonic effects, leading to improved audio fidelity and reliability. Although physically larger than paper capacitors, film types are readily available in various capacitances and voltage ratings tailored for vintage circuits. When replacing paper capacitors with film types, it’s essential to match or exceed the original voltage ratings and select tolerances that maintain the circuit’s timing and frequency response.
Key Tips for Selecting Capacitors in Vintage Radio Repair
- Match capacitance and voltage ratings closely to original specs for optimal circuit performance.
- Use film capacitors for signal and coupling applications to reduce noise and improve sound quality.
- Choose high-quality electrolytics with correct polarity for power supply replacements; consider low-leakage types for better reliability.
- Measure physical dimensions and lead spacing to ensure proper fit inside compact vintage chassis.
- Avoid generic ceramic disc capacitors in critical signal paths, as their dielectric properties often introduce distortion or instability.
By carefully selecting capacitor types that combine authentic electrical characteristics with modern reliability, you safeguard the vintage radio’s original tonal qualities while boosting long-term operational stability. This balance of tradition and technology is key to a successful vintage radio restoration project.

Image courtesy of Lech Pierchała
Resistors and Their Vintage Equivalents: How to Choose Suitable Replacement Resistors That Preserve Original Circuit Behavior
Resistors are fundamental to vintage radio circuits, setting bias points, controlling signal levels, and shaping frequency response. When selecting replacement resistors for your restoration project, it’s crucial to consider not just the nominal resistance but also the type, tolerance, power rating, and temperature coefficient to maintain the radio’s authentic operation and tonal characteristics.
Understanding Vintage Resistor Types and Modern Equivalents
Original vintage radios often used carbon composition resistors, known for their distinctive sound and interaction with analog signals. These resistors have a relatively high noise level and wide tolerance (usually ±20%), which contributes in some circuits to the unique character of vintage audio. However, carbon composition parts age poorly—drifting in value, developing micro-cracks, and sometimes changing noise behavior—which can impair performance or cause instability.
Today, the most practical replacements are:
-
Carbon Film Resistors: These resistors match carbon composition resistors fairly well in terms of tolerance (typically ±5% or better) and noise characteristics but offer improved stability and longevity. They act as an excellent choice where the original response and tonal quality need preservation without the reliability issues of aged carbon composition types.
-
Metal Film Resistors: With lower noise, tighter tolerances (±1% or better), and excellent temperature stability, metal film resistors are ideal for circuits where precision and noise reduction are paramount. However, in some audio signal paths, their cleaner, less “colored” characteristics may subtly alter the vintage sound signature.
-
Wirewound Resistors: Used mainly in power-handling roles such as cathode bias or power supplies, wirewound resistors provide robust current capacity and thermal stability. Their inductance can affect RF circuits, so avoid them in high-frequency signal paths unless original specs call for this type.
Key Criteria for Selecting Replacement Resistors in Vintage Radios
-
Resistance Value and Tolerance: Match the original resistance as closely as possible. For critical audio or tuning circuits, tighter tolerances (±1% to ±5%) help preserve circuit stability. For less sensitive sections, ±5% or even ±10% may suffice.
-
Power Rating: Ensure the replacement resistor can handle the circuit’s power dissipation—typically 0.25W to 2W in vintage radios. Using a resistor with too low a rating risks overheating and premature failure.
-
Physical Size and Lead Spacing: Vintage chassis layouts often have limited space, so selecting replacement resistors with similar form factors and lead spacing facilitates installation without modification.
-
Temperature Coefficient and Noise: Consider the resistor’s thermal stability and noise generation, especially for audio and RF stages. Carbon film offers a good compromise between vintage sound and reliability.
-
Visual Authenticity (Optional): For collectors or restorers aiming for cosmetic authenticity, carbon composition resistor replicas are available but at a premium cost and often with inferior reliability.
By carefully choosing resistor types that align with the radio’s original circuit needs, you maintain both the authentic tonal nuances and reliable performance essential to a successful vintage radio repair. This balanced approach to resistor replacement helps preserve the heritage and sonic character that define classic radios while benefiting from improved component longevity.
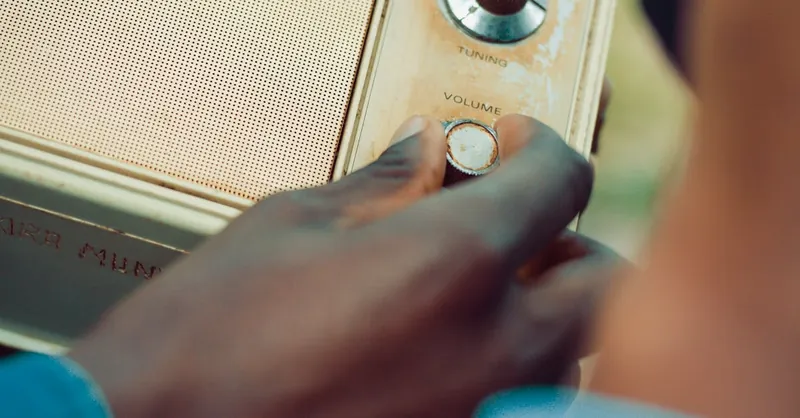
Image courtesy of Nicholas Githiri
Vacuum Tubes and Transistors: Sourcing Authentic Tubes vs. Modern Equivalents and Testing Procedures
When repairing vintage radios, vacuum tubes and transistors are arguably the heart of the circuit, and sourcing the right components is crucial for maintaining both performance and authenticity. Original vacuum tubes, prized for their warm audio characteristics and specific electrical parameters, are often scarce or expensive. Meanwhile, modern equivalents and substitutes offer more availability but may differ in gain, heater voltage, or pin configuration, affecting functionality and sound quality.
Sourcing Authentic Vacuum Tubes
For collectors and purists, authentic vintage tubes such as the classic 12AX7, 6V6, or 5Y3 models are preferred to preserve the original tonal warmth and dynamic response. Reliable sources include specialized tube dealers, auction sites, and user trade forums. When buying, always verify tube brand, manufacturing date, and condition to avoid counterfeit or heavily used units that can degrade quickly in service. Keep in mind that some older tubes may suffer from gas leaks or cathode depletion, which impairs performance.
Modern Tube Equivalents and Substitutes
In many cases, exact reproduction tubes or modern equivalents from reputable manufacturers like JJ Electronics, Electro-Harmonix, or Svetlana can provide excellent reliability and similar sonic qualities. These modern tubes usually adhere to original electrical specs but benefit from improved materials and tighter manufacturing tolerances. Compatible substitutes should always match:
- Heater voltage and current, ensuring proper filament operation without overheating.
- Pinout configuration, to fit the original socket without rewiring.
- Amplification factor and mutual conductance, to maintain gain and linearity in the circuit.
Transistors for Early Solid-State Models
For radios transitioning to early transistors in the 1950s and 1960s, replacement parts must be chosen with precision. Vintage transistors often use obsolete or rare packages (e.g., TO-5 metal cans), and their gain (hFE), leakage currents, and noise figures can significantly impact performance. While direct replacements from NOS (New Old Stock) are ideal, modern low-noise transistors with similar specifications are widely available and can boost reliability if carefully selected.
Testing Procedures for Tubes and Transistors
Before installation, rigorous testing of tubes and transistors ensures component integrity and prevents damage to your vintage radio:
-
Vacuum Tube Testing: Use a quality tube tester to check emission, transconductance (gain), and shorts between elements. Tubes that fall below 70–80% of their rated emission or exhibit shorts should be discarded or reserved for non-critical use.
-
Transistor Testing: A multimeter with a transistor test function or a dedicated transistor tester can verify junction integrity (no shorts or opens) and gain. Pay attention to leakage current readings, especially for low-noise audio transistors.
-
Socket and Pin Inspection: Before inserting tubes or transistors, examine sockets and pins for corrosion or loose connections that can cause intermittent faults or noise.
By sourcing authentic tubes when possible, choosing carefully matched modern equivalents, and implementing thorough testing procedures, you ensure your vintage radio restoration achieves optimal sound quality, reliability, and operational authenticity. This approach strikes the perfect balance between preserving historical character and benefiting from modern advances in component technology.
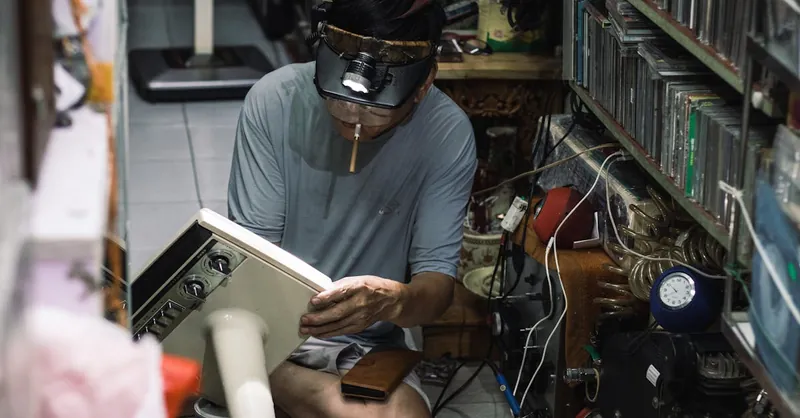
Image courtesy of Nimit N
Transformers, Inductors, and Coils: Maintaining Signal Integrity – Best Practices for Repairing or Replacing Magnetic Components
Magnetic components like transformers, inductors, and coils are the backbone of vintage radio circuits, responsible for impedance matching, filtering, tuning, and audio signal isolation. Due to their crucial role in maintaining signal integrity and preserving the radio’s distinctive tonal characteristics, repairing or replacing these components requires meticulous attention to original specifications and quality.
Understanding the Role of Magnetic Components in Vintage Radios
Transformers handle power supply isolation, audio output impedance matching, and radio frequency (RF) signal coupling, while inductors and coils shape tuning circuits and intermediate frequency (IF) transformers critical to the selectivity and sensitivity of the radio. Aging, corrosion, or winding insulation breakdown in these components can cause signal loss, distortion, or complete circuit failure.
Best Practices for Repair and Replacement
-
Assess Original Specifications Thoroughly: Before repairing or replacing, document the winding counts, inductance values, resistance, core material, and physical dimensions. These parameters directly affect resonance frequency, quality factor (Q), and overall performance.
-
Match Core Material and Construction: Vintage transformers and coils often use specific ferrite or laminated iron cores. Using a mismatched core material in replacements can alter magnetic properties, leading to frequency drift or reduced efficiency.
-
Use High-Quality Replacement Transformers: When sourcing replacements, select transformers designed for audio or RF applications with comparable turns ratio, power rating, and inductance. Specialized vintage coil manufacturers or custom winding services can provide authentic or near-original parts.
-
Test Windings and Insulation: Employ an ohmmeter or LCR meter to check continuity, winding resistance, and inductance. Also, check for shorts between windings or between windings and core. Proper insulation ensures minimal leakage and prevents hum or noise introduction.
-
Maintain Physical Fit and Lead Configuration: Vintage radio chassis often have tight layouts; replacement coils and transformers should closely match original size and mounting style to avoid mechanical strain or the need for modification.
-
Consider Rewinding When Necessary: For severely damaged coils, professional rewinding with correct gauge wire and turns count can restore original performance. Document winding details before disassembly to ensure faithful restoration.
By following these best practices, hobbyists preserve the authentic sound quality and electrical performance vintage radios demand. Magnetic components are not just passive parts; they actively shape the radio’s signature audio and frequency response, making their careful repair or replacement a pivotal step in any successful vintage radio restoration project.
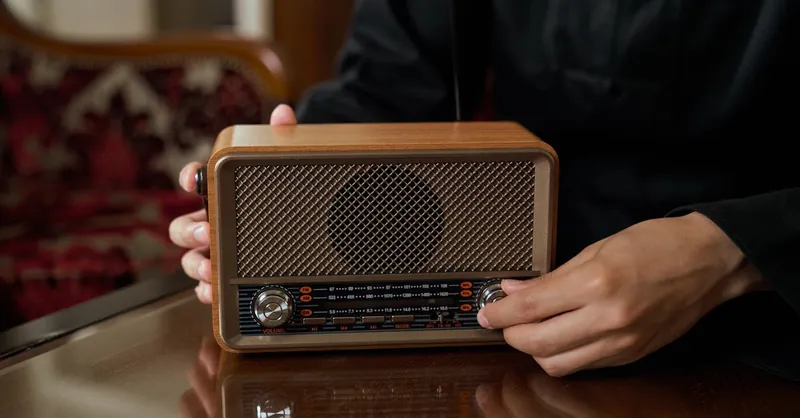
Image courtesy of Ron Lach
Dial and Speaker Components: Tips on Refurbishing or Replacing Bulky Mechanical Parts and Vintage Speakers
When restoring vintage radios, dial assemblies and speakers are often overlooked but are critical to both functionality and aesthetic authenticity. These bulky mechanical components not only influence user experience through tuning precision and sound quality but also significantly affect the radio’s original charm. Proper refurbishing or sourcing quality replacements ensures your restoration retains its vintage appeal while performing reliably.
Refurbishing Vintage Dial Assemblies
Dial mechanisms in classic radios typically include mechanical tuning drums, pointer cords, and glass or plastic dial faces. Over time, dial cords may become brittle or break, causing inaccurate tuning or stuck pointers. When refurbishing dial assemblies:
- Replace Dial Cords with Proper Gauge and Material: Use high-quality nylon or braided cords to replicate original durability and tension. Avoid cheap substitutes that stretch easily.
- Clean and Lubricate Mechanical Parts: Remove accumulated dirt and old grease from pulleys, gears, and tension springs. Use light machine oil sparingly to maintain smooth rotation without attracting dust.
- Restore or Replace Dial Faces: If the dial face is cracked or faded, consider professional restoration or sourcing period-correct reproduction dials. Maintaining legibility and original markings is essential for authenticity.
- Check Pointer Alignment and Calibration: Adjust the pointer position so it accurately reflects station frequency. Misaligned pointers reduce tuning accuracy and detract from user experience.
Repairing or Replacing Vintage Speakers
Vintage radio speakers, often constructed with paper cones, cloth surrounds, and field coil magnets, are prone to wear, degradation, and mechanical failure. Their unique acoustic properties contribute significantly to the classic warm sound vintage radios are renowned for.
- Assess Speaker Condition Thoroughly: Look for tears, cracks, or brittleness in the cone and surround. Test coil continuity with a multimeter to detect open or shorted voice coils.
- Cone and Surround Repair: Minor cone damage can sometimes be repaired with specialized adhesives or patches, but extensive deterioration usually requires re-coning by professionals to preserve original tonal character.
- Speaker Replacement Options: If restoration isn’t feasible, choose replacement speakers designed for vintage radios that emulate original impedance, power handling, and frequency response. Field coil speakers can sometimes be replaced with modern permanent magnet types, but this may alter authentic sound and often requires external power supply adaptations.
- Check and Restore Speaker Wiring: Corroded or brittle wiring can cause sound degradation or loss. Replace old leads with vintage-style insulated wire to maintain aesthetic consistency and reliable connections.
By carefully refurbishing dial assemblies and restoring or appropriately replacing vintage speakers, you uphold both the functional precision and distinctive audio signature vintage radios are loved for. These often bulky and delicate components deserve meticulous attention to detail, as they bridge the gap between historical authenticity and modern usability in your restoration projects.
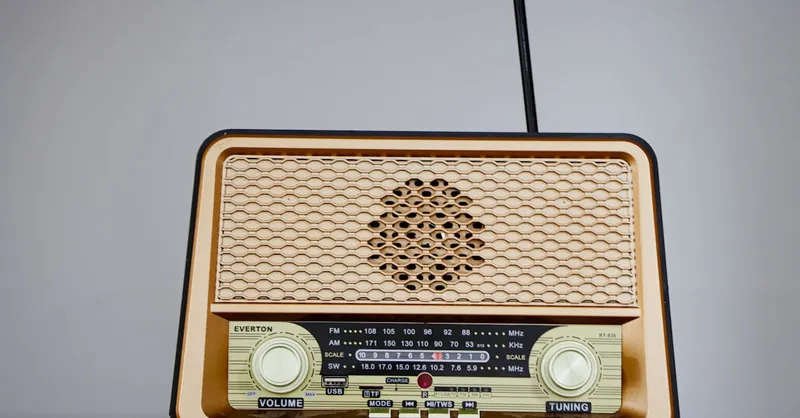
Image courtesy of Rahib Yaqubov
Sourcing Components: Reliable Suppliers, Salvage Techniques, and Online Resources for Vintage Radio Parts
One of the most critical steps in vintage radio repair is sourcing authentic and reliable components. Given the scarcity of original parts and the variability in quality among replacements, finding trustworthy suppliers and employing effective salvage methods can save time, money, and frustration. Whether you need capacitors, resistors, tubes, or rare mechanical parts, knowing where and how to look is essential for a successful restoration.
Trusted Suppliers for Vintage Radio Components
For hobbyists focused on quality and authenticity, established electronics suppliers and specialist vintage parts dealers provide a solid foundation:
-
Specialty Vintage Electronics Vendors: Companies dedicated to vintage radio parts, such as Antique Electronic Supply or TubesandMore, stock NOS (New Old Stock) tubes, repro capacitors, and repro or original mechanical components designed specifically for classic radios. These suppliers often offer detailed datasheets and compatibility guides to ensure you get the right parts.
-
Reputable Electronics Distributors: Mainstream distributors like Digi-Key, Mouser, and Element14 now carry a wide range of modern equivalents, including precision film capacitors, carbon film resistors, and contemporary vacuum tubes. Their vast inventory and fast shipping make them excellent sources for high-quality substitutes that meet vintage specifications.
-
Local Electronics and Ham Radio Shops: Smaller brick-and-mortar stores sometimes carry salvaged or NOS parts suitable for vintage radios. Building relationships with local experts can also provide valuable insight and occasional access to rare components.
Salvage Techniques: Extracting Parts from Donor Units
Salvaging components from non-working or inexpensive vintage radios and electronic equipment is a budget-friendly and sustainable method favored by many restorers:
-
Identify Donor Radios Carefully: Choose radios with similar model lines or eras to ensure compatibility, especially for tubes, coils, and specialized mechanical parts.
-
Use Proper Tools and Methods: Employ soldering irons with temperature control, desoldering pumps, and gentle mechanical extraction to avoid damaging fragile parts.
-
Test Salvaged Components Before Use: Even if parts look intact, measure capacitance, resistance, or tube emission to verify functionality. Salvaged capacitors are usually best replaced due to age-related degradation, but transformers, coils, and tubes can often be reused if in good condition.
Online Resources and Communities
Beyond suppliers, online forums, marketplaces, and hobbyist communities are invaluable for sourcing parts and advice:
-
Forums and Groups: Websites like Radiomuseum.org, Antique Radio Forums, and Reddit’s r/vintageaudio connect hobbyists worldwide, allowing you to seek recommendations, trade parts, or gain insights on hard-to-find components.
-
Auction Sites and Marketplaces: eBay and Etsy frequently list NOS tubes, vintage capacitors, and full donor radios. Exercise caution by checking seller ratings and asking questions about part conditions before purchasing.
-
Component Cross-Reference Tools: Utilize online cross-reference databases to find modern substitutes for obsolete parts, helping you choose compatible replacements that preserve circuit functionality.
By combining these sourcing strategies—leveraging trusted suppliers, smart salvage practices, and dynamic online resources—you can confidently find the best components that uphold the authenticity, quality, and functionality demanded by vintage radio restoration projects. This multi-faceted approach ensures your radios not only look pristine but operate at their historical best.
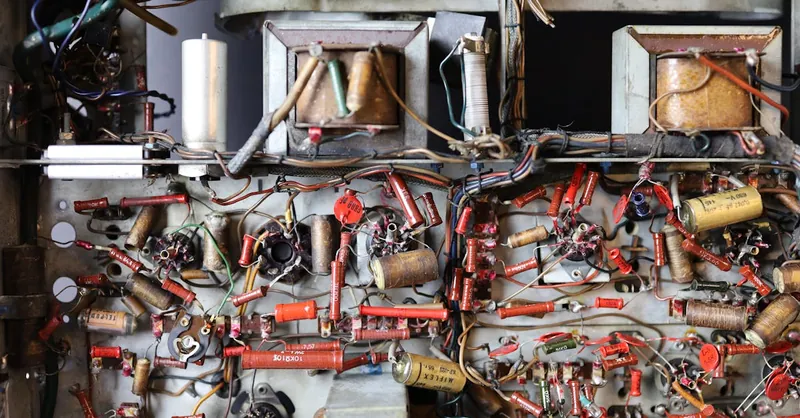
Image courtesy of Lech Pierchała
Testing Equipment and Tools: Essential Gear to Verify Components and Ensure Quality Restoration
Accurate testing is a cornerstone of successful vintage radio repair, ensuring each component meets the original specifications and functions reliably within the restored circuit. Investing in the right testing equipment and tools empowers hobbyists to diagnose faults precisely, verify replacement parts, and avoid costly trial-and-error mistakes. Whether you’re checking capacitors, resistors, tubes, or coils, comprehensive testing boosts confidence in your restoration’s quality and longevity.
Must-Have Testing Instruments for Vintage Radio Repair
-
Digital Multimeter (DMM): A fundamental tool, a reliable DMM measures voltage, current, resistance, and continuity. High-accuracy multimeters with capacitance and diode test functions help assess component integrity rapidly. When evaluating resistors and basic connections, a DMM is indispensable.
-
LCR Meter (Inductance, Capacitance, Resistance): For precision measurement of capacitors, inductors, and coils, an LCR meter provides detailed readings of capacitance values, ESR (Equivalent Series Resistance), and inductance. This is critical when confirming film capacitors’ proper specifications or verifying transformer winding health.
-
Vacuum Tube Tester: Essential for vintage radios reliant on tubes, a dedicated tube tester evaluates emission, mutual conductance, and shorts between electrodes. Assessing tube quality before installation prevents damage to the radio and ensures authentic audio performance.
-
Transistor Tester: Early solid-state radios require transistor screening. Dedicated transistor testers or advanced universal testers can measure gain (hFE), junction integrity, and leakage currents, verifying that replacements meet necessary specifications.
-
Oscilloscope: A versatile diagnostic instrument for observing signal waveforms at various circuit points. An oscilloscope reveals issues like distortion, hum, or RF interference that simple resistance checks cannot detect. It’s invaluable for tuning IF transformers and verifying audio path performance.
-
Signal Generator: Provides accurate RF and audio test signals to evaluate tuning stages, audio amplification, and demodulation circuits. Pairing a signal generator with an oscilloscope allows detailed circuit behavior analysis under operational conditions.
Recommended Hands-On Tools for Component Testing and Repairs
-
Soldering Station with Temperature Control: High-quality soldering irons ensure precise, heat-controlled solder joints that protect fragile vintage components and minimize chassis damage.
-
Desoldering Tools: Solder suckers or wick enable clean component removal without damaging circuit boards or terminals, crucial for delicate vintage radios.
-
Component Lead Bending and Cutting Tools: Properly shaped leads facilitate component installation in tight chassis layouts, preserving mechanical integrity.
-
Precision Test Clips and Probes: Insulated clips and fine probes improve measurement accuracy while preventing short circuits during in-circuit testing.
By equipping your workshop with these specialized testing instruments and tools, you establish a robust foundation for meticulous component verification and troubleshooting. This not only safeguards your investment in quality replacement parts but also guarantees that every restored vintage radio delivers authentic performance, reliability, and enduring value. Incorporating rigorous testing into your restoration workflow is a best practice that distinguishes exceptional vintage radio repair from mere component swapping.
Image courtesy of Mike Bird
Safety and Handling Practices: How to Safely Work with Vintage Electronics and Avoid Damaging Sensitive Parts
Working on vintage radios involves both electrical hazards and the risk of damaging fragile, hard-to-replace components. Practicing proper safety and handling techniques is essential not only to protect yourself from injury but also to preserve the delicate circuitry and maximize restoration success. Understanding the nuances of vintage electronics’ vulnerabilities will keep your projects safe, effective, and enjoyable.
Key Safety Guidelines When Repairing Vintage Radios
-
Unplug and Discharge Before Working: Always unplug the radio from power and fully discharge capacitors—especially high-voltage electrolytics and power supply filter caps—to prevent electric shock. Use a resistor-based discharge tool or a suitably rated probe rather than directly shorting terminals, which can damage components or cause sparks.
-
Be Mindful of High Voltages: Vintage tube radios often operate at lethal voltages exceeding 200V DC and higher on plates and power rails. Never work on a powered chassis unless you are experienced and using proper insulating equipment. Use one hand to probe whenever possible to reduce the risk of current passing through your chest.
-
Handle Components Gently to Avoid Mechanical Damage: Many vintage parts—such as paper capacitors, coils, and tube pins—are brittle or corroded. Avoid excessive force, bending leads sharply, or twisting parts, which can break internal connections or insulation.
-
Use ESD Precautions for Transistors and Semiconductors: Though older tubes are not vulnerable to static, early transistors and ICs in vintage solid-state radios are sensitive to electrostatic discharge. Use anti-static wrist straps, mats, and handle semiconductor devices by their edges.
-
Avoid Excessive Heat During Soldering: Use temperature-controlled soldering irons and apply heat only as long as needed to prevent damaging delicate parts or lifting pads on vintage circuit boards. Use fine soldering tips for precision and practice good soldering technique to prevent shorts or cold joints.
Protecting Sensitive Vintage Components from Damage
-
Test Components Outside the Circuit When Possible: Measuring resistance, capacitance, or tube emission individually avoids misdiagnosis caused by circuit parallel paths or hidden faults.
-
Store Salvaged and Replacement Parts Properly: Keep fragile capacitors, tubes, and coils in anti-static bags or cushioned containers away from moisture and dust to prevent degradation before use.
-
Document Original Wiring and Component Orientation: Taking detailed photos and notes before disassembly helps prevent wiring errors and polarity mistakes during reassembly, which can damage polarized parts like electrolytic capacitors.
By adhering to these safety protocols and careful handling techniques, you reduce the risk of injury and component damage while enhancing the longevity and authenticity of your vintage radio restorations. Safety-conscious methods enable you to work confidently and preserve the historical and functional integrity of these treasured classic electronics.

Image courtesy of Lech Pierchała
Best Practices for Component Installation and Circuit Testing to Maximize Longevity and Performance
Proper component installation and rigorous circuit testing are pivotal steps in ensuring your vintage radio restoration not only sounds authentic but also remains reliable for years to come. Precision during installation prevents stress on delicate parts, while thorough testing verifies that each replacement performs within original specifications, preserving both the radio’s tonal integrity and electrical stability.
Component Installation Best Practices
-
Ensure Correct Orientation and Polarity: Many vintage components such as electrolytic capacitors, vacuum tubes, and early transistors are polarity-sensitive. Incorrect installation can cause catastrophic component failure or degrade circuit performance. Always double-check polarity markings and consult original schematics or datasheets.
-
Use Proper Soldering Techniques: Employ a temperature-controlled soldering iron to prevent overheating components or damaging circuit boards. Use rosin-core solder for good electrical contact and avoid excessive solder that can cause shorts. Trim leads cleanly and bend leads to relieve mechanical stress, ensuring secure, vibration-resistant connections.
-
Maintain Original Lead Lengths and Physical Placement: Component leads that are too short or excessively long can introduce unwanted inductance or capacitance, altering the circuit’s frequency response. Maintaining the original physical layout helps preserve tuning accuracy, prevents parasitic effects, and facilitates troubleshooting.
-
Secure Components Firmly but Gently: Ensure mounting tabs, clips, or brackets hold components to reduce movement and eventual lead fatigue. Avoid overtightening screws or compressing components, which might crack capacitors or deform coil windings.
Circuit Testing Strategies for Reliable Restoration
-
Initial Visual Inspection and Continuity Check: Before powering the radio, inspect solder joints, wiring, and component orientation thoroughly. Use a digital multimeter to verify continuity and correct resistance values, identifying open circuits or shorted leads.
-
Power-Up with Current Limiting and Monitoring: When first energizing the radio, use a current-limiting device such as a variac or series bulb limiter to prevent damage from unintended shorts or faulty parts. Monitor current draw closely to detect anomalies early.
-
Functional Testing at Each Stage: Test power supply voltages, bias points, and signal levels at critical circuit nodes using a multimeter and oscilloscope. Verify that tubes or transistors operate within specified parameters to ensure proper amplification and frequency response.
-
Audio and RF Signal Verification: Employ a signal generator to inject known frequencies and confirm tuner, IF, and audio stages respond correctly. Listen for distortion, hum, or noise indicating aging component issues or installation errors.
-
Repeat Measurements After Warm-Up: Vintage radios may exhibit parameter shifts due to thermal effects. Performing tests after the unit reaches operating temperature helps identify intermittent faults and ensures components function reliably under real conditions.
By following these best practices for installation and circuit testing, hobbyists maximize the performance, lifespan, and sonic fidelity of restored vintage radios. Attention to detail during these final stages transforms quality components and careful sourcing into a truly authentic and dependable vintage audio experience.
Image courtesy of FURQAN KHURSHID