
How to Make Touch Sensitive Switches: Step-by-Step Guide
Category: Digital Electronics
Discover How to Easily Make Touch Sensitive Switches for Your Projects
If you're an electronics hobbyist or enthusiast eager to add a sleek, modern touch to your circuits, learning how to make touch sensitive switches is a must-have skill. Maybe you’ve struggled with bulky mechanical switches or are looking for that futuristic interface that responds to the lightest touch. You’ve landed here because you want a clear, hands-on guide that covers both analog and digital methods, practical circuits, and quick troubleshooting tips—all in one place. This post is tailored specifically for you, whether you’re building a custom radio, experimenting with microcontrollers, or crafting interactive home gadgets.
Unlike dry technical manuals or overly complex schematics, this guide walks you through touch switch principles, design choices, and easy-to-follow tutorials so you can confidently build and modify your own touch-sensitive controls. From understanding the fundamental electronics behind capacitive sensing to wiring up your first circuit and testing it, you’ll gain insights that go beyond simply following instructions. By the end, you’ll not only have a working switch but also the know-how to innovate and adapt touch technology for a wide array of projects. Let’s get started and bring your circuits to life with the magic of touch!
- Discover How to Easily Make Touch Sensitive Switches for Your Projects
- Understanding Touch Sensitive Switches: Basics and Types
- Key Components and Tools Needed for Making Touch Sensitive Switches
- Simple Analog Touch Switch Circuit – Step-by-Step Guide
- Microcontroller-Based Capacitive Touch Switches: Building Digital Touch Controls with Arduino
- Designing Reliable Touch Switches: Noise Reduction and Sensitivity Tuning
- Integrating Touch Switches into Complex Projects
- Troubleshooting Common Problems with Touch Sensitive Switches
- Advanced Variations and Enhancements – Exploring Multi-Touch Sensing, Slider Controls, and Wireless Touch Interfaces
- Safety and Best Practices when Working with Touch Circuits
- Sources for Components and Further Learning
Understanding Touch Sensitive Switches: Basics and Types
Touch sensitive switches are electronic components designed to detect physical contact, allowing users to control devices without the need for mechanical buttons or toggles. At their core, these switches respond to the human touch by sensing changes in electrical properties—primarily capacitance or resistance—when a finger comes into contact with or approaches the sensor surface. This intuitive interaction makes touch switches popular in a variety of applications, from consumer electronics and home automation to radio technology and DIY hobbyist projects.
There are two primary types of touch sensitive switches to understand: capacitive and resistive.
-
Capacitive Touch Switches:
These switches work by detecting changes in the capacitance between a sensor pad and the human body. When your finger approaches or touches the sensor surface, it alters the local electric field and modifies the capacitance, triggering the switch. Capacitive touch switches are highly sensitive, support multi-touch in some cases, and are widely used in smartphones, touch lamps, and modern appliances. They generally require a microcontroller or dedicated capacitive sensing IC for reliable operation. -
Resistive Touch Switches:
Resistive switches operate by detecting a change in resistance. A simple resistive touch sensor delivers a measurable change in electrical resistance when pressed or touched, as the conductive layers or materials come into contact. While less sensitive and requiring physical pressure compared to capacitive switches, resistive touch sensors are easier to build with basic analog components and are well-suited for rugged environments or low-cost applications.
Each type has its own advantages and trade-offs in terms of sensitivity, durability, complexity, and cost, making the choice of touch switch technology crucial depending on your project’s needs. Understanding these basics helps you decide how to integrate touch-sensitive controls effectively, whether you’re upgrading a vintage radio, crafting interactive electronics, or developing a custom home automation interface.

Image courtesy of RDNE Stock project
Key Components and Tools Needed for Making Touch Sensitive Switches
Before diving into building touch sensitive switches, it’s essential to gather the right electronic components and tools to ensure a smooth and successful project. Whether you’re crafting simple resistive touch switches or more advanced capacitive designs, the following list highlights the key parts and equipment commonly used in popular touch switch circuits.
Essential Electronic Components
-
Capacitive Touch Sensors / Sensor Pads
For capacitive touch switches, sensor pads or electrodes—made from conductive materials like copper tape or aluminum foil—act as the interface that detects changes in capacitance caused by a finger’s proximity. -
Transistors (BJTs or MOSFETs)
Bipolar Junction Transistors (BJTs) or Metal-Oxide-Semiconductor Field-Effect Transistors (MOSFETs) amplify the tiny signals from the sensor or act as electronic switches to drive a load such as an LED or relay. -
Capacitors and Resistors
Discrete capacitors and resistors form the timing and filtering elements of many touch circuits, stabilizing signals and setting sensitivity thresholds. -
Integrated Circuits (ICs)
- Capacitive sensing ICs: Dedicated chips like the TTP223 or the MPR121 simplify touch detection by internally measuring capacitance changes and outputting a digital signal compatible with microcontrollers.
-
Op-amps and comparators: Used in analog touch circuits to detect subtle voltage changes from sensor inputs.
-
Microcontrollers (optional but powerful)
Popular microcontrollers such as Arduino, ESP32, or PIC microcontrollers can process capacitive sensor inputs with built-in or external capacitive sensing libraries, enabling customizable touch switch behavior. -
Output Components
Outputs like LEDs, buzzers, relays, or transistors help indicate switch status or control other parts of your circuit once a touch event is detected.
Must-Have Tools for Building and Testing
-
Multimeter:
An indispensable tool for measuring voltage, current, and resistance, verifying connections, and troubleshooting circuit issues. -
Soldering Iron and Accessories:
For assembling components securely on PCBs or perfboards, soldering irons with fine tips, solder wire, and desoldering tools are necessary. -
Breadboard and Jumper Wires:
Ideal for prototyping circuits quickly without permanent soldering, allowing easy modifications during testing. -
Oscilloscope (optional but recommended):
Useful for visualizing signal changes and capacitive variations in real-time, helping refine sensitivity settings. -
Wire Strippers and Cutters:
To prepare wires and sensors accurately for clean connections. -
Safety Gear:
Such as safety glasses and a fume extractor, especially when soldering, to maintain a safe working environment.
By assembling these components and tools, you’ll lay a strong foundation for building reliable and responsive touch sensitive switches. Equipped with the right parts and equipment, your hands-on work with both analog and digital touch circuits will become a rewarding and educational experience.
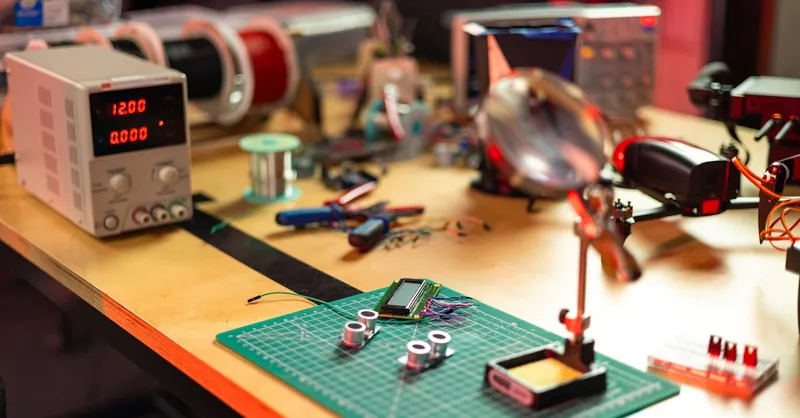
Image courtesy of ThisIsEngineering
Simple Analog Touch Switch Circuit – Step-by-Step Guide
Creating a simple analog touch switch circuit is a great way to start exploring touch-sensitive technology with minimal components and straightforward wiring. Unlike digital capacitive sensors that often require microcontrollers or ICs specialized in capacitance measurement, analog touch switches rely on basic electronic principles—primarily detecting changes in resistance or capacitance using discrete components such as transistors, resistors, and capacitors. This makes the circuit ideal for beginners and DIY enthusiasts aiming for quick hands-on success without complex coding or programming.
How the Analog Touch Switch Works
In this basic design, your finger acts as a variable resistor or capacitor, altering the circuit’s electrical characteristics when it touches the sensor pad. These changes trigger a transistor to switch on or off, effectively turning a connected load like an LED, buzzer, or relay. By carefully selecting resistor and capacitor values, the circuit achieves sensitivity to a light touch while filtering out noise and false triggers.
Components You’ll Need for the Circuit
- NPN Transistor (e.g., 2N3904) – Amplifies the small signal caused by touch.
- Resistors – Typically, one high-value resistor (1 MΩ or higher) sets the sensor sensitivity, while others handle biasing and load.
- Capacitor (optional, ~0.01µF to 0.1µF) – Helps stabilize the input and reduce interference.
- Sensor electrode – A small metallic pad connected to the transistor base acts as the touch interface.
- Power supply – 5V or 9V typical for hobbyist projects.
- Output device – LED or relay to show the switching action.
Basic Schematic Overview
- The touch sensor pad connects through a high-value resistor to the transistor base, allowing the finger’s capacitance and resistance to modulate the base current.
- When the finger touches the pad, the transistor gets enough base current to switch and energize the output stage.
- The output device, such as an LED, turns on, providing clear visual feedback.
PCB Layout Tips for Analog Touch Switches
- Keep sensor traces short and wide: This minimizes noise pickup and improves touch sensitivity.
- Isolate sensor pads from ground planes: Prevent stray capacitance that could reduce responsiveness.
- Use a grounded guard ring: Surrounding the sensor pad with a grounded copper outline can shield it from interference.
- Place decoupling capacitors close to the transistor power pins: This reduces noise and stabilizes operation.
- Separate power and signal grounds: Helps avoid ground loops that may cause false triggering.
Mastering this simple analog touch switch builds a strong foundation for more advanced capacitive and digital designs. With this circuit, you can quickly add touch-sensitive controls to your radio projects, interactive gadgets, or custom electronic devices using only a handful of inexpensive and accessible components.
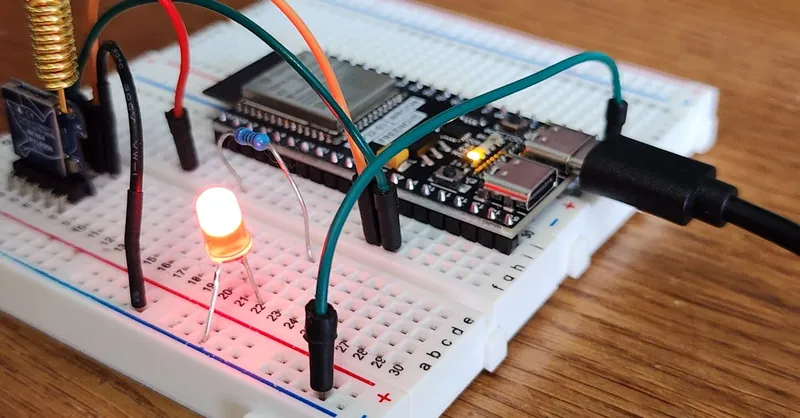
Image courtesy of Bmonster Lab
Microcontroller-Based Capacitive Touch Switches: Building Digital Touch Controls with Arduino
Harnessing the power of microcontrollers like Arduino takes capacitive touch sensing to the next level, enabling you to create highly reliable, customizable, and feature-rich digital touch switches for your electronics projects. Unlike analog circuits that rely on passive components, microcontroller-based capacitive touch switches actively measure changes in capacitance using software algorithms and built-in libraries, delivering precise touch detection, programmable sensitivity, and versatile output control.
Why Use Microcontrollers for Capacitive Touch Sensing?
- Enhanced Sensitivity and Stability: Microcontrollers process sensor input digitally, filtering noise and adapting thresholds dynamically to avoid false triggers common in simple analog circuits.
- Configurable Parameters: Using Arduino libraries, you can easily adjust responsiveness, debounce time, and detection range without modifying hardware.
- Multifunction Capabilities: Beyond switching, microcontrollers enable implementing fade-in/out LEDs, toggling multiple outputs, or combining touch sensing with wireless control.
- Compact and Scalable Solutions: With a single microcontroller, you can handle multiple touch sensors, streamlining your PCB design and making your projects more elegant.
Basic Components for an Arduino Capacitive Touch Switch
- Arduino Board (Uno, Nano, or similar): Acts as the brain to run capacitive sensing code and manage outputs.
- Touch Sensor Electrode: A conductive pad (copper foil, PCB trace, or metal plate) connected to an Arduino input pin.
- Resistor (1 MΩ or higher): Used as the sensing resistor in the capacitive sensing circuit.
- Output Devices: LEDs, relays, buzzers, or other modules controlled by Arduino pins based on touch input.
- Power Supply: Typically 5V provided by the Arduino board itself.
Circuit Setup and Code Essentials
A typical Arduino capacitive touch setup involves wiring a sensor pad to an input pin with a high-value resistor to ground, forming a capacitive RC circuit. The Arduino’s CapacitiveSensor library measures the time it takes to charge and discharge, interpreting longer times as touch events.
#include <CapacitiveSensor.h>

// Define sensor pin and send pin
CapacitiveSensor csensor = CapacitiveSensor(4, 2); // send pin 4, receive pin 2

void setup() {
  Serial.begin(9600);
  csensor.set_CS_AutocaL_Millis(0xFFFFFFFF); // Disable auto calibration for stable reading
  pinMode(13, OUTPUT); // Built-in LED for output
}

void loop() {
  long sensorValue = csensor.capacitiveSensor(30); // Take 30 samples
  Serial.println(sensorValue);

  if(sensorValue > 1000){  // Threshold to detect touch (adjust as needed)
    digitalWrite(13, HIGH); // Turn on LED on touch
  } else {
    digitalWrite(13, LOW); // Turn off LED otherwise
  }
  delay(50);
}
Calibration and Fine-Tuning for Reliable Operation
- Set Thresholds Carefully: Monitor sensor readings with and without touch to determine an appropriate activation threshold that avoids noise.
- Adjust Sampling Count: Increasing the number of samples improves accuracy but may slow response time.
- Shield and Grounding: Properly shield sensor pads and ground the microcontroller board to reduce interference.
- Use Separate Power Supplies for Sensitive Projects: To prevent power fluctuations from affecting sensitivity.
By leveraging Arduino and its capacitive sensing libraries, you gain full control over your touch switch’s behavior — from simple on/off toggles to complex gestures or multi-touch applications. This microcontroller-based approach inspires flexibility and innovation in your radio technology projects, home automation systems, or custom gadgets, making digital touch sensitive switches accessible and engaging for hobbyists and experts alike.
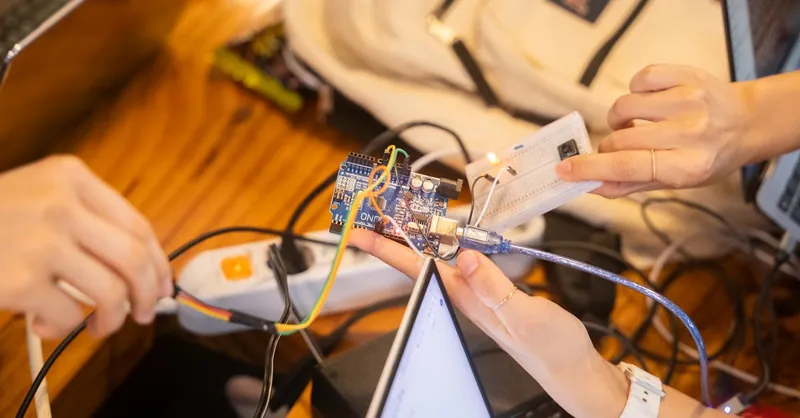
Image courtesy of Youn Seung Jin
Designing Reliable Touch Switches: Noise Reduction and Sensitivity Tuning
Creating stable and practical touch sensitive switches goes beyond assembling components; it requires careful attention to minimizing false triggers caused by electrical noise, interference, and environmental factors. Whether your project uses analog circuitry or microcontroller-based capacitive sensing, effective noise reduction and precision sensitivity tuning are critical for ensuring reliable operation and a smooth user experience.
Key Strategies for Minimizing False Triggers
-
Shielding and Grounding:
Properly shield sensor electrodes and sensitive input lines using grounded copper layers or conductive enclosures to block electromagnetic interference (EMI). Establish a solid ground reference by connecting the sensor’s guard ring or enclosure to circuit ground, reducing stray capacitance and induced noise. -
Optimized Sensor Layout:
Keep sensor leads short and avoid running sensor traces parallel to noisy power or signal lines. Using guard rings—a grounded trace surrounding the sensor pad—helps isolate it from interference without compromising sensitivity. -
Filtering and Debouncing:
Include hardware filters like small capacitors on sensor inputs to smooth out rapid voltage fluctuations, and implement software debouncing or averaging algorithms in microcontrollers to discriminate genuine touches from transient glitches. -
Power Supply Stabilization:
Use decoupling capacitors near IC power pins and consider separate voltage regulation for sensitive touch circuits to prevent fluctuations that cause erratic behavior.
Adjusting Sensitivity for Practical Use
Tuning sensitivity is essential to balance responsiveness with noise immunity, and it depends on your sensor design, environment, and application:
-
In Analog Circuits:
Modify resistor and capacitor values controlling the input stage to fine-tune how much capacitance change triggers the transistor. Higher resistor values increase sensitivity but may also magnify noise, so find the optimal compromise. -
In Microcontroller-Based Designs:
Adjust thresholds dynamically by monitoring raw sensor readings and setting activation levels above ambient noise but below intentional touch signals. Using libraries with auto-calibration features or adding environmental compensation routines can enhance stability over time and temperature variations.
By implementing these best practices—strategic shielding, robust grounding, proper filtering, and careful sensitivity calibration—you can build touch sensitive switches that deliver consistent, false-trigger-free performance. This attention to detail ensures your electronic projects, from radios to home automation systems, respond instantly and reliably, elevating both functionality and user satisfaction.
Image courtesy of Tima Miroshnichenko
Integrating Touch Switches into Complex Projects
When incorporating touch sensitive switches into more advanced electronics, such as digital control systems, radio modules, or power management circuits, careful design and integration strategies are essential to ensure seamless operation and reliability. Combining touch sensing technology with other electronic subsystems unlocks versatile real-world applications—from smart radio interfaces and wireless controls to energy-efficient home automation and beyond.
Tips for Smooth Integration with Digital Electronics and Microcontrollers
-
Use Dedicated Touch Sensing ICs or Libraries:
Leveraging specialized ICs like the TTP223 or microcontroller capacitive sensing libraries not only offloads the signal processing from your main processor but also simplifies integration. This results in more robust touch detection that coexists harmoniously with other digital peripherals like displays, sensors, or communication modules. -
Manage Signal Interference in Mixed Circuits:
Since touch sensors rely on subtle changes in capacitance or resistance, they are sensitive to noise generated by digital switching signals, RF transmissions, and power supply fluctuations. Use proper layout techniques—such as grounding guard rings, segregating analog and digital grounds, and shielding sensitive sensor lines—to mitigate unwanted interference when integrating with high-frequency radio modules or microcontroller circuits. -
Implement Interrupt or Polling Strategies:
Optimize system responsiveness and power consumption by choosing either interrupt-driven touch detection, which triggers immediate reactions, or periodic polling based on your project requirements. This flexibility allows integrating touch switches into complex event-driven systems or low-power wireless devices effectively.
Combining Touch Switches with Radio Technology and Power Management
-
Radio Module Integration:
In radio projects, touch switches can serve as intuitive user interfaces—for example, tuning control, mode selection, or volume adjustment. To avoid RF noise coupling into the sensor inputs, maintain physical separation and use low-pass filtering on sensor lines. Additionally, handle grounding carefully to prevent ground loops that impact both radio frequency performance and touch detection accuracy. -
Power Management Systems:
Touch switches are ideal for energy-saving controls in battery-powered or solar-operated devices. When integrated with power management ICs or microcontrollers controlling sleep modes, touch sensors can act as wake-up triggers. Combining this with debounce routines and low-current sensing design ensures longer battery life while providing responsive user experience.
Best Practices for Real-World Applications
-
Test Under Actual Operating Conditions:
Environmental factors such as humidity, temperature, and enclosure materials can affect touch sensor performance. Always validate your integrated design in the environment where it will be used. -
Modular Design Approach:
Design touch sensor circuits as modular blocks with well-defined interfaces to simplify troubleshooting and upgrades in complex projects. -
Consider User Experience:
Design sensor geometry, sensitivity, and feedback mechanisms like LEDs or buzzers to provide intuitive and reliable human interaction with your device.
By thoughtfully integrating touch sensitive switches with other digital electronics, radio modules, and power management systems, you can elevate hobbyist projects to professional-grade applications that are responsive, energy-efficient, and user-friendly. This multidisciplinary approach expands the possibilities of your electronics designs, keeping them at the forefront of hands-on innovation and practical functionality.

Image courtesy of Julia Nobre
Troubleshooting Common Problems with Touch Sensitive Switches
Even well-designed touch sensitive switches can sometimes exhibit issues like intermittent switching, no response, or erratic behavior. Diagnosing and resolving these problems efficiently is essential to ensure your circuits perform reliably in real-world applications. Here are practical tips and possible modifications to help you troubleshoot and optimize your touch sensitive switches, whether analog or microcontroller-based.
Diagnosing Common Issues
- Intermittent Switching or False Triggers
- Cause: Electrical noise, poor grounding, or environmental interference can lead to false activation or unstable switching.
-
Fix: Improve shielding by adding grounded guard rings around sensor pads and keep sensor leads short. Add hardware filtering capacitors (e.g., 10nF) near inputs and verify power supply stability with decoupling capacitors. In microcontroller designs, tune software debounce and increase detection thresholds.
-
No Response to Touch
- Cause: Sensor pad or wiring issues, incorrect resistor values, or damaged components may prevent touch detection.
-
Fix: Test the sensor electrode continuity and ensure correct wiring. Verify that high-value resistors (1MΩ or above) are in place to allow proper capacitive coupling. In digital circuits, check that the microcontroller input pins are properly configured and that libraries are initialized correctly.
-
Erratic or Unstable Behavior
- Cause: Power supply fluctuations, electromagnetic interference (EMI), or improper layout can cause unpredictable switch operation.
- Fix: Use regulated and filtered power supplies. Physically separate sensor traces from high-frequency signals or noisy components. Employ a grounded metal enclosure or shielding to reduce EMI. Also, ensure that software routines running on microcontrollers are not causing timing conflicts or delays affecting sensing intervals.
Practical Modifications to Enhance Reliability
- Add a Grounded Guard Ring or Shield: Surrounding your sensor pad with a dedicated grounded trace greatly reduces capacitive coupling with unintended sources, improving stability.
- Use Higher-Quality Components: Precision resistors with low tolerance and low-leakage capacitors improve analog circuit predictability.
- Implement Software Filtering and Calibration: For microcontroller-based switches, incorporate smoothing algorithms, adaptive thresholding, and periodic auto-calibration to compensate for environmental changes over time.
- Check Environmental Factors: Humidity, temperature shifts, and proximity to metal objects can affect capacitive sensing. Test and adjust your design accordingly for the intended operational environment.
By methodically applying these troubleshooting techniques and design improvements, your touch sensitive switches will become more robust, responsive, and reliable, enhancing the overall quality and functionality of your electronics projects. This proactive approach to problem-solving not only saves time but also deepens your understanding of touch sensing technology for future innovations.

Image courtesy of Tima Miroshnichenko
Advanced Variations and Enhancements – Exploring Multi-Touch Sensing, Slider Controls, and Wireless Touch Interfaces
As you gain confidence with basic touch sensitive switches, stepping into advanced touch sensing techniques unlocks exciting possibilities for more interactive and dynamic hobbyist projects. Incorporating multi-touch capabilities, slider and proximity controls, or even wireless touch interfaces elevates how you interact with your circuits, making them more intuitive, versatile, and engaging while pushing the limits of analog and digital electronics.
Multi-Touch Sensing: Beyond Single Points of Contact
Multi-touch sensing allows detection of multiple simultaneous touches on a single sensor array, enabling complex input gestures such as tapping, swiping, or pressing multiple buttons at once. Implementing multi-touch:
-
Capacitive Sensor Arrays:
Arrange multiple sensor pads in a grid or linear layout, each connected to individual inputs of a microcontroller or capacitive sensing IC supporting multiple channels (e.g., MPR121). This setup detects how many and which pads are touched concurrently. -
Software Algorithms for Gesture Recognition:
Use firmware that interprets touch patterns and positions, distinguishing touch points and enabling gesture-based commands for volume fading, track skipping, or mode switching in radios, audio players, or custom interfaces. -
Benefits for Hobby Projects:
Multi-touch increases input flexibility without mechanical complexity, perfect for creating sleek control panels, digital radios with advanced tuning options, or compact home automation controls.
Slider and Proximity Controls: Smooth and Analog Touch Interfaces
Touch sliders or proximity sensors provide continuous positional input rather than simple on/off states, greatly expanding user interaction possibilities.
-
Capacitive Touch Sliders:
Consist of a series of small, closely spaced capacitive pads that sense finger location by measuring a gradual change in capacitance across the array. Microcontrollers process these values to output smooth, analog-style position signals. -
Applications:
Use sliders for adjusting volume, dimming lights, or controlling signal parameters like tuning frequency in radios. Since sliders detect finger movement along a surface, they create a modern and seamless user experience without mechanical wear. -
Proximity Sensing:
Extend your touch designs to detect finger approach without contact, useful for activating circuits or waking devices from sleep mode. This enhances durability and hygiene in public or battery-powered devices.
Wireless Touch Interfaces: Integrating Touch with IoT and Remote Controls
Taking touch sensing wireless pushes the frontier of hobbyist projects towards Internet of Things (IoT) and remote-control applications.
-
Wireless Touch Sensors:
Combine capacitive touch sensors with wireless microcontrollers or modules like ESP32, NRF24L01, or Bluetooth Low Energy (BLE) chips. Touch data is transmitted wirelessly to other devices, enabling remote control functionality. -
Benefits:
- Eliminates wiring constraints and mechanical linkages.
- Enables touch control panels that can be placed anywhere, ideal for smart homes or distributed radio setups.
-
Facilitates integration with smartphones, tablets, or wireless hubs, increasing project versatility.
-
Implementation Tips:
- Address power management carefully for battery-powered sensors by using low-power modes and wake-on-touch features.
- Use reliable wireless protocols and incorporate error handling to ensure responsive and glitch-free touch command transmission.
By exploring these advanced touch variations and enhancements, you enrich your electronics projects with cutting-edge, user-friendly interfaces. Whether you build multi-touch radio controls, elegant sliders for analog parameter tuning, or wireless touch modules for IoT integration, mastering these techniques will set your hobbyist creations apart with sophistication and innovation.

Image courtesy of Pixabay
Safety and Best Practices when Working with Touch Circuits
When working with touch sensitive switches and related electronic components, prioritizing safety and durability is essential—not only to protect yourself but also to ensure your circuits perform reliably over time. Whether you're assembling simple analog designs or integrating advanced microcontroller-based capacitive sensors, following best practices safeguards your projects and enhances longevity.
Recommendations for Safe Handling of Electronic Components
-
Avoid Electrostatic Discharge (ESD):
Sensitive components like ICs, microcontrollers, and capacitive sensing modules can be damaged by static electricity. Always discharge static from your body before handling parts by using anti-static wristbands or touching grounded metal objects. Work on ESD-safe mats if possible and store components in anti-static bags. -
Work with Proper Voltage Levels:
Most hobbyist touch circuits operate at low voltages (3.3V, 5V, or 9V), but always double-check power supply ratings and circuit connections to prevent accidental overvoltage, which can destroy components or cause unsafe conditions. -
Isolate Power for Touch Sensors:
To reduce electrical noise and accidental short circuits, consider isolating touch sensing circuits from high-current or high-voltage sections of your project. Using optocouplers or relays to interface with loads is a good practice where appropriate. -
Soldering Safety:
Use a well-ventilated area and wear safety glasses while soldering. Avoid breathing in fumes, and keep your work area organized to prevent burns or accidental damage to delicate parts.
Maintaining Durability of Touch Interfaces
-
Choose Robust Sensor Materials:
Use durable conductive materials like copper tape with protective insulating layers or specialized touch sensor films to withstand repeated use and environmental exposure. -
Provide Proper Insulation:
When building capacitive touch pads, ensure the sensing surface is coated with a thin insulating layer (e.g., plastic or acrylic) to prevent corrosion, wear, and false triggering due to moisture or dirt. -
Avoid Mechanical Stress:
Mount sensor pads and components securely to prevent loose connections or damage from vibration. Flexible PCBs or sensor films should be handled gently to maintain integrity. -
Environmental Protection:
Consider enclosure design to protect touch switches from dust, humidity, and temperature extremes, especially for outdoor or harsh-environment applications.
Summary of Best Practices for Reliable and Safe Touch Circuits
| Best Practice | Benefit |
|---|---|
| Use ESD protection | Prevents damage to sensitive ICs and sensors |
| Verify voltage and polarity | Ensures components are not overstressed or damaged |
| Insulate touch surfaces | Increases sensor lifespan and reduces false triggers |
| Employ proper grounding | Reduces noise and improves detection accuracy |
| Work in a clean, organized space | Minimizes accidental damage and enhances troubleshooting |
By rigorously applying these safety guidelines and durability measures, you build touch sensitive switches that are not only responsive and accurate but also safe and robust enough for long-term use. This disciplined approach is especially important in hobbyist electronics where component replacement can be costly and design iterations frequent. Safe, durable touch circuits form the foundation of successful projects across digital electronics, radio technology, and hands-on hobby builds.

Image courtesy of Mikhail Nilov
Sources for Components and Further Learning
To successfully build and expand your expertise in touch sensitive switches, sourcing affordable and reliable electronic components is crucial. Fortunately, the global maker and hobbyist community has access to an abundance of suppliers and educational resources, enabling you to find quality parts without breaking the bank while deepening your practical knowledge in both analog and digital touch sensing technologies.
Where to Find Affordable Components and Modules
-
Online Electronics Retailers:
Popular websites such as Digi-Key, Mouser Electronics, Element14, and SparkFun offer a wide range of components, including capacitive touch ICs (like the TTP223), transistors, resistors, capacitors, and microcontrollers. These sites provide detailed datasheets and fast shipping options to hobbyists worldwide. -
Specialized Hobbyist Platforms:
Websites like AliExpress, Banggood, and eBay feature highly affordable sensor modules, PCB boards, and touch sensor kits. While prices are competitive, it’s important to review seller ratings and product reviews to ensure component quality and compatibility. -
Local Electronics Stores and Maker Spaces:
For immediate needs and hands-on assistance, local electronics shops and community maker spaces can be invaluable. These venues often stock common components and provide expert advice, as well as opportunities to collaborate with fellow enthusiasts. -
Component Salvaging:
Reusing components from discarded electronics—such as capacitive touch buttons from old smartphones or switches from appliances—can be both cost-effective and environmentally friendly, adding a practical dimension to your learning.
Recommended Books and Reference Materials
-
“The Art of Electronics” by Paul Horowitz and Winfield Hill:
An essential read for analog circuit design, this book provides a solid foundation for understanding the principles behind touch sensing and transistor-based switching circuits. -
“Make: Sensors” by Tero Karvinen, Kimmo Karvinen, and Ville Valtokari:
A hands-on guide offering practical sensor projects, including capacitive touch sensing techniques suited to hobbyists and beginners. -
“Arduino Cookbook” by Michael Margolis:
A comprehensive resource for programming and integrating microcontrollers with touch sensors, this book helps bridge hardware and software effectively.
Online Resources and Communities
-
Arduino Official Website and Forums:
Access tutorials, example codes, and community support focused on capacitive sensing and microcontroller-based touch switch projects. -
Electronics Stack Exchange:
A Q&A platform where hobbyists and experts discuss troubleshooting and advanced touch circuit designs. -
Instructables and Hackster.io:
Step-by-step guides and innovative project ideas related to touch sensitive switches, often with downloadable schematics and source code. -
YouTube Channels:
Channels such as GreatScott!, Afrotechmods, and EEVblog provide excellent video tutorials on touch sensor circuit construction, theory, and troubleshooting. -
Reddit Communities:
Subreddits like r/electronics, r/arduino, and r/AskElectronics offer vibrant discussions and project showcases related to touch technology and hobbyist electronics.
By tapping into these affordable component sources, authoritative books, and dynamic online communities, you equip yourself with the tools, knowledge, and support necessary to master touch sensitive switches. Engaging with these resources not only accelerates your learning but also connects you with a passionate global network of electronics hobbyists and professionals eager to share insights and inspire your projects.
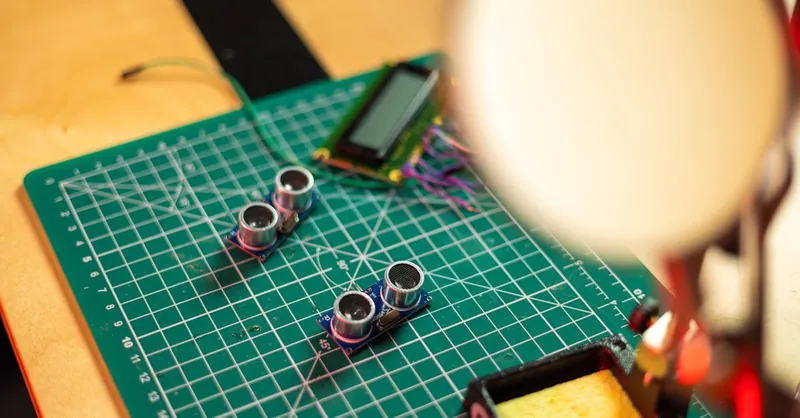
Image courtesy of ThisIsEngineering