
Top 10 Common Mistakes in Analog Circuit Design
Category: Digital Electronics
Avoid These Analog Circuit Design Pitfalls to Boost Your Projects
If you're an electronics hobbyist or an enthusiast diving into analog circuit design, you’ve likely encountered frustrating errors that halt progress or cause unstable circuits. Maybe your amplifier introduces unexpected noise or your signal distortion ruins a carefully crafted radio receiver. This guide is tailored to you—the hands-on experimenter seeking clear, practical insights into the usual missteps when designing analog circuits.
You came here because you want to identify and fix common design mistakes early, saving time, components, and headaches. Unlike generic theory-heavy resources, this post breaks down real-world errors with straightforward explanations and actionable advice to empower your projects. Whether you’re breadboarding your first analog project or refining complex radio tech, you’ll discover how small oversights—from grounding flaws to component mismatches—can cause cascading failures.
Read on to uncover a logically structured walkthrough of typical pitfalls and the best practices that prevent them. We focus on helping you build robust, clean, and reliable analog electronics that perform as expected. Let’s sharpen your skills by learning from common analog circuit design mistakes so your next build works flawlessly.
- Avoid These Analog Circuit Design Pitfalls to Boost Your Projects
- Power Supply Problems: Understanding Noise, Ripple, and Regulation Issues
- Grounding and Layout Errors: How Poor Practices Lead to Noise and Instability
- Component Selection Mistakes: Choosing Incompatible or Low-Quality Parts
- Incorrect Biasing and Operating Points: Avoiding Nonlinearities and Distortion
- Neglecting Temperature Effects and Component Tolerances on Circuit Stability
- Ignoring Signal Integrity: Improper Coupling, Shielding, and PCB Routing
- Overlooking Feedback and Compensation in Amplifier Designs
- Misusing Analog Integrated Circuits: Understanding Datasheets and Pinouts
- Common Measurement and Testing Errors That Lead to Misdiagnosis
- Not Accounting for Load Variations and Interface Impedances in Design
Power Supply Problems: Understanding Noise, Ripple, and Regulation Issues
One of the most overlooked yet critical mistakes in analog circuit design is neglecting power supply quality. A noisy or unstable power supply can degrade your entire circuit’s performance, causing erratic behavior, increased noise floor, and distorted signals that ruin even the best component choices. Understanding and mitigating common power supply issues—such as noise, ripple, and poor regulation—is essential for building reliable and clean analog projects.
Noise and Ripple: The Silent Circuit Killers
Power supply noise often comes from switching regulators, nearby digital circuits, or inadequate filtering. This unwanted high-frequency noise can couple into sensitive analog stages, raising the overall noise floor and reducing signal integrity. Similarly, ripple—typically a low-frequency AC variation superimposed on the DC supply—can introduce hum or oscillations, especially in audio amplifiers or radio front ends. To combat these problems:
- Use Low-Noise Regulators and Linear Power Supplies: Where precision is key, favor linear regulators over switching types or pair a switching supply with post-regulation filtering.
- Incorporate Adequate Decoupling and Bulk Capacitors: Ceramic capacitors near IC pins tackle high-frequency noise, while electrolytic capacitors smooth ripple at the input and output stages.
- Apply LC or RC Filters: Adding dedicated filters can further clean the supply rails for ultra-sensitive sections.
Regulation Issues: Keeping Voltage Stable Under Load
Unstable or poorly regulated power rails directly impact analog circuit stability. Voltage fluctuations can cause shifts in operating points, leading to gain variation, distortion, or even component damage. Common pitfalls include using undervalued regulators, insufficient heat sinking, and ignoring load transient responses. To maintain proper regulation:
- Select regulators that can handle your circuit’s maximum current with margin.
- Implement proper thermal management to prevent regulator thermal shutdown.
- Test with actual load conditions to verify stable output voltage under varying current draw.
By prioritizing a clean, well-regulated power supply, you set the foundation for an analog design that performs reliably—transforming your prototypes into robust, noise-free projects that stand up to real-world challenges.

Image courtesy of Pixabay
Grounding and Layout Errors: How Poor Practices Lead to Noise and Instability
A fundamental yet frequently underestimated cause of noise and instability in analog circuits is improper grounding and layout techniques. Even the best-designed schematics can fall apart if grounding paths create unwanted current loops or if sensitive nodes pick up interference due to suboptimal component placement. Grounding errors and careless PCB layout introduce ground bounce, crosstalk, and electromagnetic interference (EMI), which manifest as hum, oscillations, or erratic operation—problems that are often difficult to diagnose post-build.
The Crucial Role of Proper Grounding
Grounding may seem straightforward, but in analog circuit design, a solid ground strategy is essential for minimizing noise. A common mistake is using a single ground wire or trace for multiple noisy and sensitive circuit sections, which causes ground shifts that degrade the signal reference. To optimize grounding:
- Implement a Single-Point (Star) Ground: Connect all ground returns at a single low-impedance node to prevent ground loops.
- Separate Analog and Digital Grounds: If your project mixes analog and digital sections, keep grounds separate and join them only at one point to minimize interference.
- Use a Ground Plane: On PCBs, a continuous ground plane reduces parasitic inductance and provides a stable, low-resistance reference, critical for shielding sensitive analog signals.
Layout Best Practices for Noise Reduction and Stability
Beyond grounding, the physical layout of components and routing of traces significantly impact circuit performance. Long or winding traces act as antennas, picking up stray electromagnetic waves or injecting noise back into the circuit. Key layout guidelines include:
- Keep Signal Paths Short and Direct: Minimize trace length especially for high-impedance or sensitive inputs to reduce pickup and parasitic capacitance.
- Place Decoupling Capacitors Close to IC Pins: This ensures effective high-frequency noise suppression.
- Separate High-Current and Sensitive Signal Traces: Power lines or outputs carrying large currents should never run parallel or close to analog input traces to avoid coupling.
- Avoid Starving Ground Returns: Thick ground traces or planes with low resistance improve current return paths and reduce voltage differentials across the ground system.
By mastering grounding and layout principles, you can significantly reduce noise, prevent unwanted oscillations, and improve the overall stability of your analog circuits. Careful attention here often saves hours of troubleshooting and improves the clarity and fidelity of your signals, crucial for precision audio, radio receivers, and sensor interfaces.
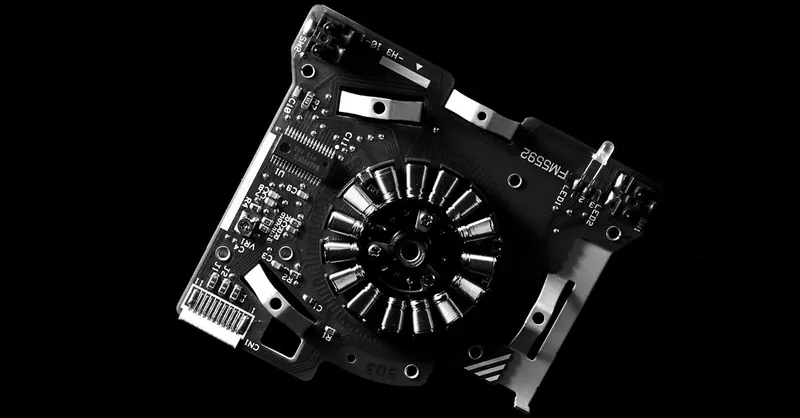
Image courtesy of Miguel Á. Padriñán
Component Selection Mistakes: Choosing Incompatible or Low-Quality Parts
Selecting the right components is crucial for analog circuit success, yet it remains one of the most common pitfalls among hobbyists and even experienced designers. Choosing incompatible or low-quality parts can lead to unpredictable results such as signal distortion, increased noise, component failure, or circuit instability—issues that waste time and resources. Unlike digital circuits, analog designs are highly sensitive to the electrical characteristics of each component, so informed selection based on specifications and application suitability is a must.
Why Component Compatibility Matters
Analog circuits rely heavily on precise characteristics like tolerance, temperature coefficients, frequency response, and noise figure. For example, using a resistor with a high tolerance value in a critical gain stage can cause gain variations and distortion. Similarly, selecting capacitors without considering their dielectric type or equivalent series resistance (ESR) might introduce unexpected phase shifts or reduce filter effectiveness. To avoid these issues:
- Match Component Specs to Circuit Requirements: Always evaluate datasheets for parameters such as accuracy, power rating, voltage rating, and frequency behavior in the context of your application.
- Consider Temperature and Environmental Factors: Components behave differently under temperature variations; choose parts rated for your operating environment to maintain stability.
- Beware of Substitutions Without Analysis: Not all components can be swapped interchangeably—substitutes must meet or exceed original specs to ensure reliability.
The Hidden Risks of Low-Quality Parts
Cheap or counterfeit components may seem like a budget-friendly option but can severely compromise your analog designs. Problems stemming from these parts include:
- Higher Noise Levels: Low-grade op-amps or transistors often have inferior noise performance, impacting sensitive amplifiers or radio front ends.
- Inconsistent Performance: Variations in fabrication quality can cause parameter drift, leading to circuit failure over time.
- Reduced Lifespan and Reliability: Components from unreliable sources may fail due to poor internal construction or materials.
To safeguard your projects, source components from reputable suppliers and, when possible, test critical parts before integration. Investing time in quality selection upfront pays dividends in circuit stability, longevity, and predictable performance—key factors for hobbyists and professionals alike aiming for polished analog electronics.
By understanding and avoiding component selection mistakes, you ensure your analog circuit is built on a solid foundation, avoiding unpredictable behaviors and maximizing your design’s true potential.
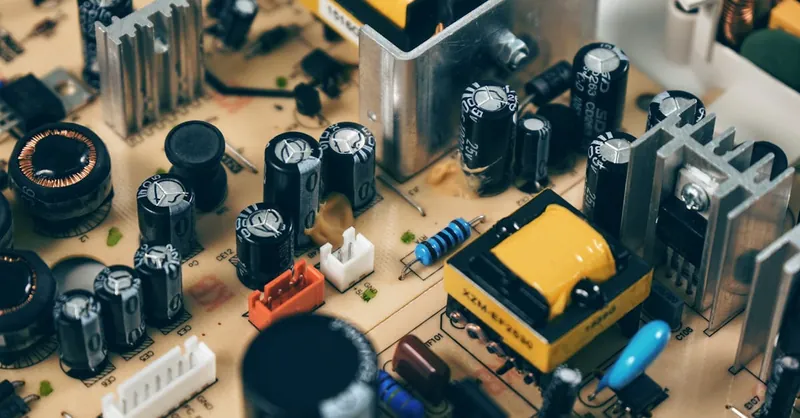
Image courtesy of Pixabay
Incorrect Biasing and Operating Points: Avoiding Nonlinearities and Distortion
One of the most critical yet often overlooked mistakes in analog circuit design is incorrect biasing and the mismanagement of operating points. Every active device—such as transistors, FETs, or operational amplifiers—relies on a carefully set bias to operate within its linear region. If the bias is off, the device can enter nonlinear regions causing signal distortion, clipping, or even damaging stress on components. Getting biasing right is essential to ensure stable gain, low distortion, and predictable circuit behavior.
Why Proper Biasing Matters
Incorrect biasing shifts the operating point, which can lead to:
- Nonlinearities: Devices working outside their linear range introduce harmonic distortion that degrades signal quality, a critical problem in audio and RF circuits.
- Reduced Headroom: Insufficient biasing limits the voltage or current swing before clipping occurs, reducing dynamic range and increasing distortion.
- Thermal Instabilities: Poor bias design often results in unstable quiescent currents that vary with temperature, causing drift in performance or thermal runaway especially in bipolar transistors.
- Increased Noise and Crosstalk: Improper operating points make active components more susceptible to noise, degrading overall circuit fidelity.
Best Practices for Setting Operating Points
To avoid these pitfalls and maintain high-fidelity analog operation:
- Consult Device Datasheets: Understand the recommended bias conditions (voltage, current, temperature) and typical operating regions.
- Use Stable Bias Networks: Employ resistive dividers, constant current sources, or regulated voltage references to provide stable and reproducible biasing.
- Incorporate Feedback and Compensation: Negative feedback can stabilize gain and operating point while compensation techniques counteract temperature-induced drift.
- Test Under Real Conditions: Validate bias points at the device pins using multimeters or oscilloscopes during actual circuit operation and adjust as necessary.
By carefully designing and verifying biasing and operating points, you ensure your analog circuits function within their optimal regions. This attention to detail dramatically reduces distortion, improves signal linearity, and enhances reliability—key factors for successful audio amplifiers, radio front ends, and sensitive sensor interfaces. Avoiding biasing mistakes is fundamental to crafting robust and distortion-free analog electronics that meet your project’s exacting standards.

Image courtesy of Jakub Zerdzicki
Neglecting Temperature Effects and Component Tolerances on Circuit Stability
A critical yet often overlooked mistake in analog circuit design is ignoring temperature variations and component tolerances, which can severely impact circuit stability and performance. Many hobbyists focus solely on nominal component values and room-temperature conditions, but in real-world applications, temperature fluctuations and inherent component variability cause shifts in operating points, gain, and linearity, leading to unpredictable and unstable behavior in sensitive analog circuits.
The Impact of Temperature on Analog Circuits
Analog components—such as transistors, diodes, and operational amplifiers—are sensitive to temperature changes that affect parameters like gain, offset voltage, leakage current, and threshold voltages. For instance:
- Transistor bias currents drift with temperature, potentially causing thermal runaway or distortion.
- Resistor values change with temperature due to their temperature coefficient (TC), affecting voltage dividers or feedback networks.
- Capacitors may vary in capacitance or ESR across temperature ranges, altering filter cutoff frequencies or timing circuits.
Failing to account for these effects can cause circuits to lose calibration, oscillate unexpectedly, or degrade signal integrity over time and temperature cycles.
Importance of Component Tolerances for Reliable Designs
Even at stable temperatures, every analog component comes with manufacturer-specified tolerances—the permissible deviations from nominal values. Neglecting these tolerances, especially in critical paths like gain-setting resistors or reference voltages, results in:
- Gain inaccuracies and signal distortion: Small resistor mismatches can shift amplifier gains or cause offset errors.
- Filter response variations: Component tolerance stack-up can move cutoff points or degrade filter roll-off.
- Unstable bias points: Variations in device parameters shift operating points, making circuits less predictable.
Best Practices to Manage Temperature and Tolerance Effects
To enhance the stability and reliability of your analog circuits, incorporate these strategies:
- Select components with tight tolerances and low temperature coefficients for critical roles—metal film resistors over carbon, C0G/NP0 ceramic capacitors instead of electrolytics where stability matters.
- Design bias and feedback networks with temperature compensation, such as using matched transistor pairs or incorporating thermistors for dynamic adjustment.
- Simulate worst-case scenarios using component tolerance and temperature variation data before hardware implementation.
- Consider environmental conditions during testing by varying temperature and monitoring circuit parameters for drift or instability.
By integrating these approaches, you ensure your analog circuits maintain consistent performance across temperature ranges and component variability, a crucial step toward professional-grade, stable electronics. Ignoring temperature effects and tolerances is a recipe for frustrated troubleshooting and inconsistent results, especially in precision amplifiers, oscillator circuits, and radio frequency front ends where stability is paramount.
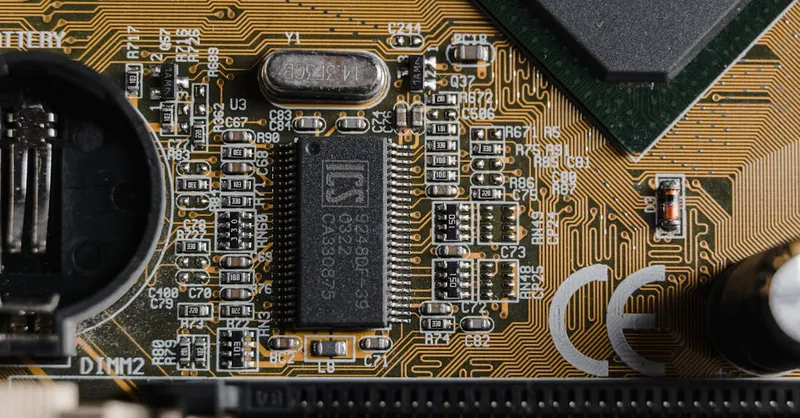
Image courtesy of Tima Miroshnichenko
Ignoring Signal Integrity: Improper Coupling, Shielding, and PCB Routing
Another frequent yet often underestimated mistake in analog circuit design is ignoring signal integrity through improper coupling, shielding, and PCB routing. Signal integrity issues manifest as unwanted noise, interference, or distorted waveforms that severely degrade overall circuit performance—especially in sensitive analog systems like radio receivers, audio amplifiers, and sensor interfaces. Ensuring proper signal path management is essential to preserve clean, low-distortion signals and prevent frustrating troubleshooting sessions.
The Importance of Proper Coupling Techniques
Coupling methods determine how signals transition between circuit stages. Using the wrong coupling type or poorly implemented coupling components can introduce DC offsets, bandwidth limitations, or noise coupling:
- AC vs DC Coupling: Use AC coupling capacitors to block DC bias between stages when necessary, preventing operating point shifts. Conversely, avoid unnecessary AC coupling where DC continuity is required to maintain bias stability.
- Selecting Coupling Capacitors: Choose capacitors with low equivalent series resistance (ESR) and suitable frequency response. Electrolytic capacitors for low frequencies and film capacitors for audio or RF maintain signal fidelity.
- Impedance Matching: Match source and load impedances to reduce reflections and standing waves, critical in high-frequency analog and RF circuits.
Shielding to Prevent Electromagnetic Interference (EMI)
Analog signals are highly susceptible to external interference. Without proper shielding, environmental electromagnetic fields from power supplies, motors, or digital circuits can couple into sensitive analog nodes, increasing noise floor and distorting signals. Key shielding tips include:
- Use Shielded Cables or Coaxial Lines: For signal lines exposed outside the PCB or between modules, shielding reduces pickup of unwanted noise.
- Enclose Sensitive Sections in Metal or Conductive Shields: Grounded enclosures act as Faraday cages that block radiated EMI.
- Implement Grounded Guard Traces: Surrounding sensitive analog traces with grounded traces on the PCB can reduce capacitive coupling and crosstalk.
PCB Routing Strategies to Maintain Signal Integrity
The way you route traces on your PCB profoundly affects signal quality. Poor routing can cause crosstalk, ground bounce, and signal reflections:
- Keep Analog Signal Traces Short and Direct: Avoid unnecessarily long or meandering routes, which act as antennas picking up or radiating noise.
- Separate Analog and High-Speed Digital Traces: Maintain physical spacing and avoid parallel runs between noisy digital signals and sensitive analog lines.
- Use Controlled Impedance and Differential Routing: For high-frequency analog signals, controlled impedance traces on multilayer PCBs ensure signal integrity and reduce reflections.
- Route Return Paths Carefully: Ensure minimal loop area by routing ground returns directly under corresponding signal traces, reducing electromagnetic emissions and susceptibility.
By giving deliberate attention to proper coupling, adequate shielding, and thoughtful PCB routing, you safeguard your analog circuits from signal degradation and interference. Mastering signal integrity principles is a cornerstone of professional analog design that guarantees your projects deliver clean, reliable, and high-fidelity performance every time.

Image courtesy of David Yu
Overlooking Feedback and Compensation in Amplifier Designs
One of the most common and costly mistakes in analog circuit design is overlooking the proper implementation of feedback and compensation techniques in amplifier circuits. Feedback plays a critical role in stabilizing gain, reducing distortion, improving bandwidth, and controlling the overall frequency response of amplifiers. Neglecting these principles often results in unstable amplifiers that oscillate, exhibit excessive noise, or produce distorted outputs—problems especially prevalent in high-gain or wideband analog designs.
Why Feedback Matters in Amplifier Circuits
Feedback involves routing a portion of the output signal back to the input to control gain and linearity. When designed correctly, negative feedback dramatically enhances amplifier performance by:
- Stabilizing gain against variations in component values or temperature changes.
- Reducing nonlinear distortion and noise, resulting in cleaner and more accurate signal amplification.
- Extending bandwidth by mitigating gain roll-off at higher frequencies.
- Improving input and output impedance characteristics, enabling better drive and load matching.
Failure to incorporate suitable feedback networks or misunderstanding their effect can cause the amplifier to enter positive feedback regimes unintentionally, leading to oscillations and jittery behavior. Moreover, improperly designed feedback loops may worsen phase shifts and gain peaking instead of stabilizing the system.
The Importance of Compensation for Stability
Frequency compensation is another vital aspect of amplifier design closely tied to feedback. Active devices and their associated feedback paths introduce phase delays which, if left uncorrected, can cause the amplifier to become unstable and oscillate. Compensation techniques—such as adding compensation capacitors, miller capacitors, or RC snubbers—are used to manage phase margins and ensure a stable closed-loop system.
Key points to consider include:
- Analyze the amplifier’s frequency response carefully to identify potential stability issues.
- Implement compensation components aligned with manufacturer recommendations and empirical testing.
- Simulate feedback loops using SPICE or equivalent tools to predict behavior before physical prototyping.
- Beware of overcompensation, which can reduce bandwidth unnecessarily or degrade transient response.
By prioritizing proper feedback and compensation design, your amplifier circuits will achieve stable gain, low distortion, and predictable frequency response, elevating the quality and reliability of your analog electronics projects—whether for audio, radio, or sensor signal conditioning applications. Ignoring these concepts is a frequent source of frustrating instability that can derail even well-intentioned analog builds.

Image courtesy of Dayvison Tadeu
Misusing Analog Integrated Circuits: Understanding Datasheets and Pinouts
One of the most frequent and costly mistakes in analog circuit design is misusing analog integrated circuits (ICs) due to misunderstanding datasheets and pin configurations. Analog ICs, including operational amplifiers, voltage regulators, analog switches, and sensor interfaces, come with detailed datasheets that provide vital information on electrical characteristics, pin assignments, operating limits, and recommended application circuits. Ignoring or misinterpreting these details often leads to incorrect wiring, damaged components, and poor circuit performance.
Why Proper Datasheet Comprehension is Crucial
Datasheets are the blueprint for successful analog IC implementation. Key reasons to thoroughly understand them include:
- Pinout Accuracy: Incorrect pin connections are a common source of failure. For example, reversing power supply pins or misidentifying input/output leads can cause permanent chip damage.
- Absolute Maximum Ratings: Exceeding voltage, current, or thermal limits specified in datasheets risks component breakdown or erratic behavior.
- Typical Operating Conditions: Knowing recommended supply voltages, input bias ranges, and temperature limits ensures the IC operates within its linear and stable region.
- Electrical Characteristics: Parameters such as input offset voltage, input bias current, slew rate, gain bandwidth product, and noise figure impact circuit design decisions and overall analog performance.
- Application Notes and Example Circuits: Most datasheets include suggested layouts and usage tips that help avoid common pitfalls and optimize performance.
Avoiding Pinout and Connection Errors
Because many analog IC packages look similar, it’s easy to mismatch pins without close attention. To prevent this:
- Consult the specific device datasheet from the manufacturer rather than relying on generic or third-party summaries.
- Double-check pin numbering and functions (e.g., input, output, ground, power) before soldering or breadboarding.
- Beware of multiple versions or variants of the same IC family that may differ in pin configuration or electrical limits.
- Use socket adapters or breakout boards when prototyping complex or surface-mount ICs to reduce risk of permanent soldering mistakes.
By investing time in careful datasheet study and validation of pin assignments, you ensure your analog ICs are applied correctly and operate as intended. This foundational habit reduces troubleshooting cycles, improves circuit reliability, and accelerates your path to robust analog project success.
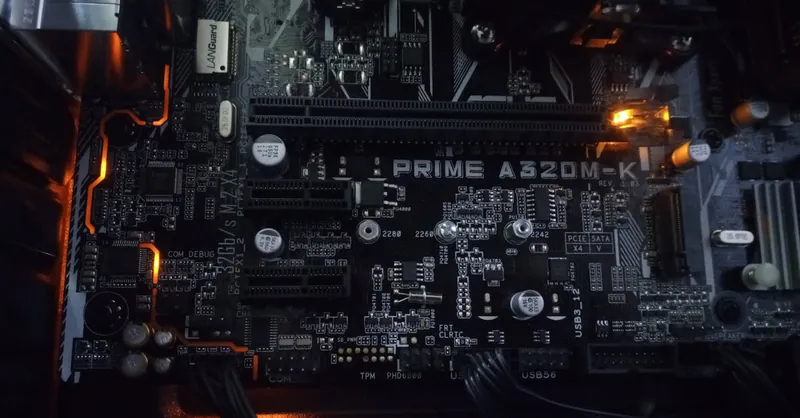
Image courtesy of cyber2120
Common Measurement and Testing Errors That Lead to Misdiagnosis
Even the best-designed analog circuits can suffer from incorrect measurements and testing practices, resulting in misdiagnosis and misinterpretation of circuit behavior. Measurement errors often stem from inappropriate test equipment usage, improper probing techniques, or overlooked test setup limitations—issues that cause confusion, wasted debugging time, and incorrect troubleshooting conclusions. Understanding and avoiding these common pitfalls is essential for hobbyists and professionals alike who want accurate, reliable assessment of their analog circuits.
Common Measurement Mistakes in Analog Circuit Testing
-
Using Incorrect Test Instruments or Settings:
Selecting a multimeter, oscilloscope, or signal generator with insufficient bandwidth, resolution, or accuracy can mask real problems or introduce measurement artifacts. For example, a slow or low-quality oscilloscope probe may distort fast transient signals or filter out high-frequency noise critical for diagnosing RF circuits. -
Poor Probing Techniques:
Long ground leads, loose contacts, or improper probe grounding cause noise pickup, ground loops, and inaccurate voltage or current readings. This often leads to false assumptions about circuit stability or noise performance. Always keep probe grounds short and use differential probes when necessary. -
Ignoring Loading Effects:
Measuring devices draw current and can alter the circuit conditions they intend to measure. For instance, connecting a low-impedance voltmeter across a high-impedance node can shift bias points or attenuate signals, misleading designers about the true operating behavior. -
Neglecting Temperature and Environmental Conditions During Testing:
Testing only at room temperature or under ideal lab conditions ignores real-world variations. Circuits may behave differently when exposed to temperature shifts or electromagnetic interference, which can only be discovered through comprehensive test scenarios.
Best Practices for Accurate Analog Circuit Measurements
- Use Properly Calibrated and Suitable Equipment: Ensure measurement tools match the frequency range and precision requirements of your circuit.
- Optimize Probe Placement and Grounding: Keep leads and ground clips as short as possible to reduce inductance and noise pickup. Where possible, use Kelvin probes or handheld differential probes in sensitive measurements.
- Consider the Impact of Measurement Setup: Evaluate whether the test instrument might load the circuit or introduce interference; use buffer amplifiers or active probes to mitigate this.
- Perform Tests Under Representative Conditions: Simulate actual operating environments including temperature variation, supply fluctuations, and signal levels to capture realistic performance data.
By mastering correct measurement and testing techniques, you reduce the risk of misdiagnosing analog circuits, save troubleshooting time, and gain clearer insights into the true behavior of your designs. Accurate measurement is the cornerstone of effective analog debugging and optimization, enabling your projects to reach their full potential with confidence.

Image courtesy of Alexander Dummer
Not Accounting for Load Variations and Interface Impedances in Design
A subtle yet impactful mistake often seen in analog circuit design is failing to consider load variations and interface impedances between stages. When you neglect how the connected load or the source impedance interacts with your circuit, it can cause unexpected signal attenuation, distortion, or even instability. This issue is especially prevalent in multi-stage analog systems such as amplifiers, filters, or radio front ends where signal integrity depends on precise impedance matching and consistent loading conditions.
The Impact of Load Variations on Circuit Performance
Loads are rarely static in real-world applications; their impedance can change due to component tolerances, temperature, or dynamic circuit conditions. Ignoring these variations means your designed operating points and signal levels might shift unpredictably, resulting in:
- Gain Reduction: High or varying load impedance can reduce output voltage swings or affect amplifier linearity.
- Distortion and Bandwidth Alteration: Reactive loads (capacitive or inductive) may cause phase shifts that distort signals or narrow frequency response.
- Circuit Instability: Improper load matching can promote oscillations or ringing, compromising overall stability.
To guard against these problems, always design your circuit considering worst-case load scenarios and verify operation across expected load ranges.
Understanding and Managing Interface Impedances
The interface between stages—whether analog amplifiers, ADC inputs, sensors, or filters—can introduce impedance mismatches that hamper signal transfer. Key points to consider include:
- Source Impedance and Input Impedance: Ensure the output stage’s source impedance is significantly lower than the next stage’s input impedance to avoid signal attenuation.
- Impedance Matching for Maximum Power Transfer: In RF and high-frequency analog circuits, proper impedance matching (e.g., 50 Ω systems) minimizes reflections and preserves signal integrity.
- Buffering and Isolation: Employ voltage followers, buffering amplifiers, or impedance matching networks to decouple stages, stabilize loads, and protect sensitive inputs from varying source conditions.
Best Practices for Handling Load and Interface Effects
- Model and Simulate Load Conditions: Use circuit simulation tools to predict how your design behaves under varying load impedances and frequencies.
- Use Buffer Amplifiers: Intersperse buffers between stages with mismatched impedances to maintain signal fidelity and reduce loading effects.
- Design for Impedance Matching: Where relevant, incorporate matching networks, transformers, or attenuators to align impedances.
- Test Under Realistic Load Conditions: Validate prototypes with expected load ranges and interface configurations to uncover potential issues early.
By carefully accounting for load variations and interface impedance effects in your analog circuit design, you ensure stable gain, clean signals, and robust performance under diverse operating conditions. Ignoring these factors often leads to subtle yet frustrating signal degradation and instability, undermining your project’s success and reliability.

Image courtesy of MART PRODUCTION